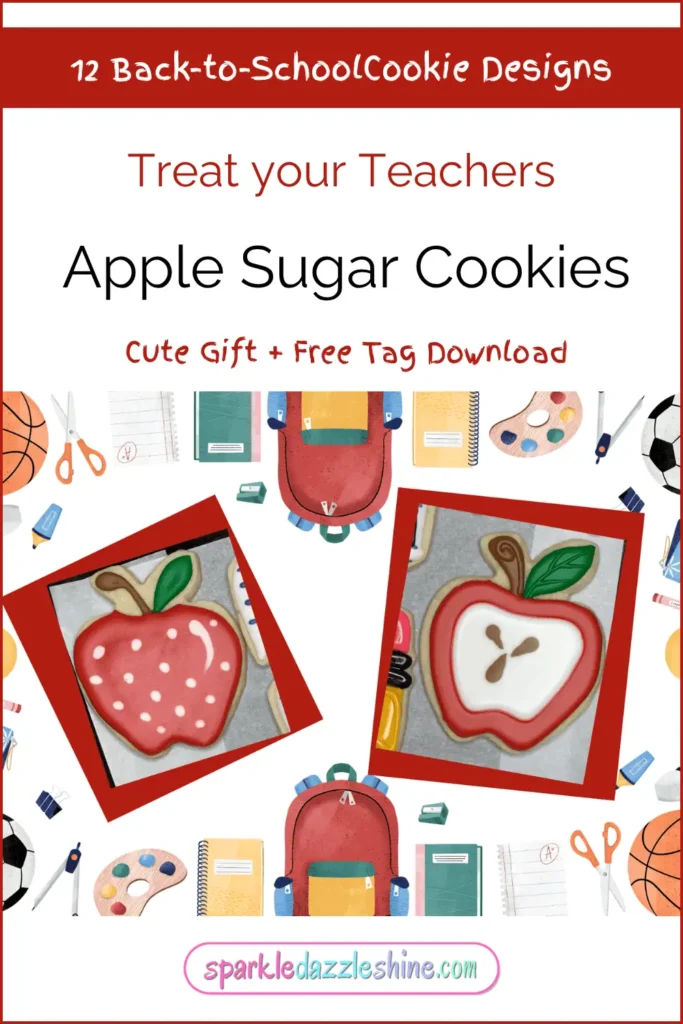
Pretty in Pink Pencil Sugar Cookies
✏️ Pretty in Pink Pencil Sugar CookiesTwo Back-to-School Pencil Sugar Cookies (Easy to Intermediate)
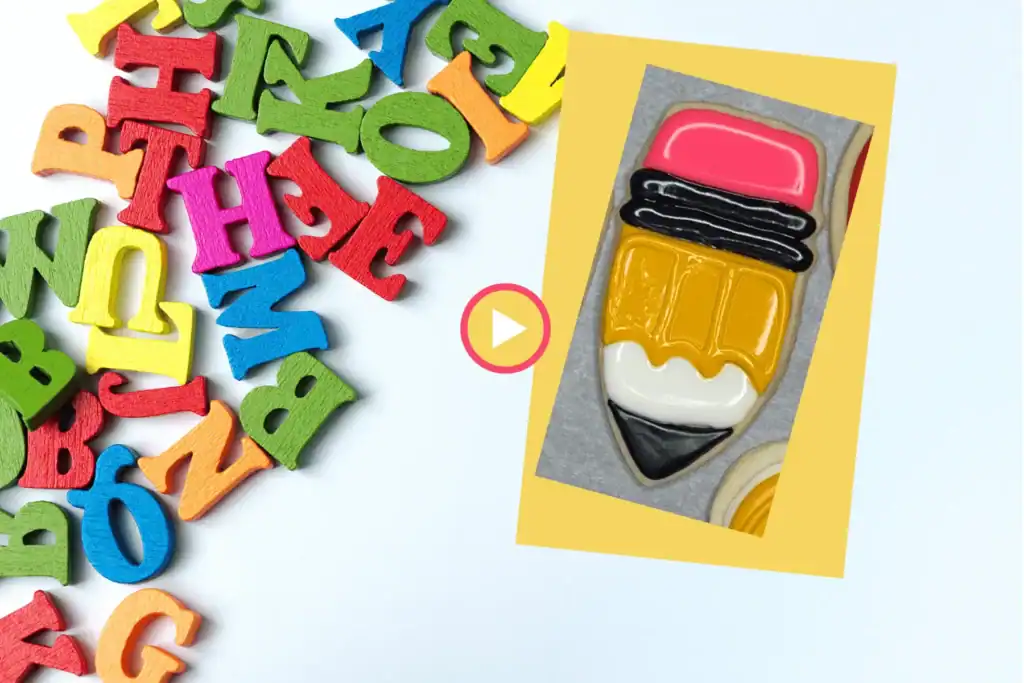
Pretty In Pink Pencil Sugar Cookies to start the school year. There’s something magical about fresh pencils and clean notebooks at the start of a new school year… but let’s be real—cookies make it even better. 😄
This “Pretty in Pink” pencil cookie is part of my Back-to-School Sugar Cookie Series and is perfect for decorators who want something a little extra cute, but still beginner-friendly. Inspired by the colorful pencils kids love these days, this pink pencil cookie is cheerful, simple, and sweetly stylish. Let’s decorate!
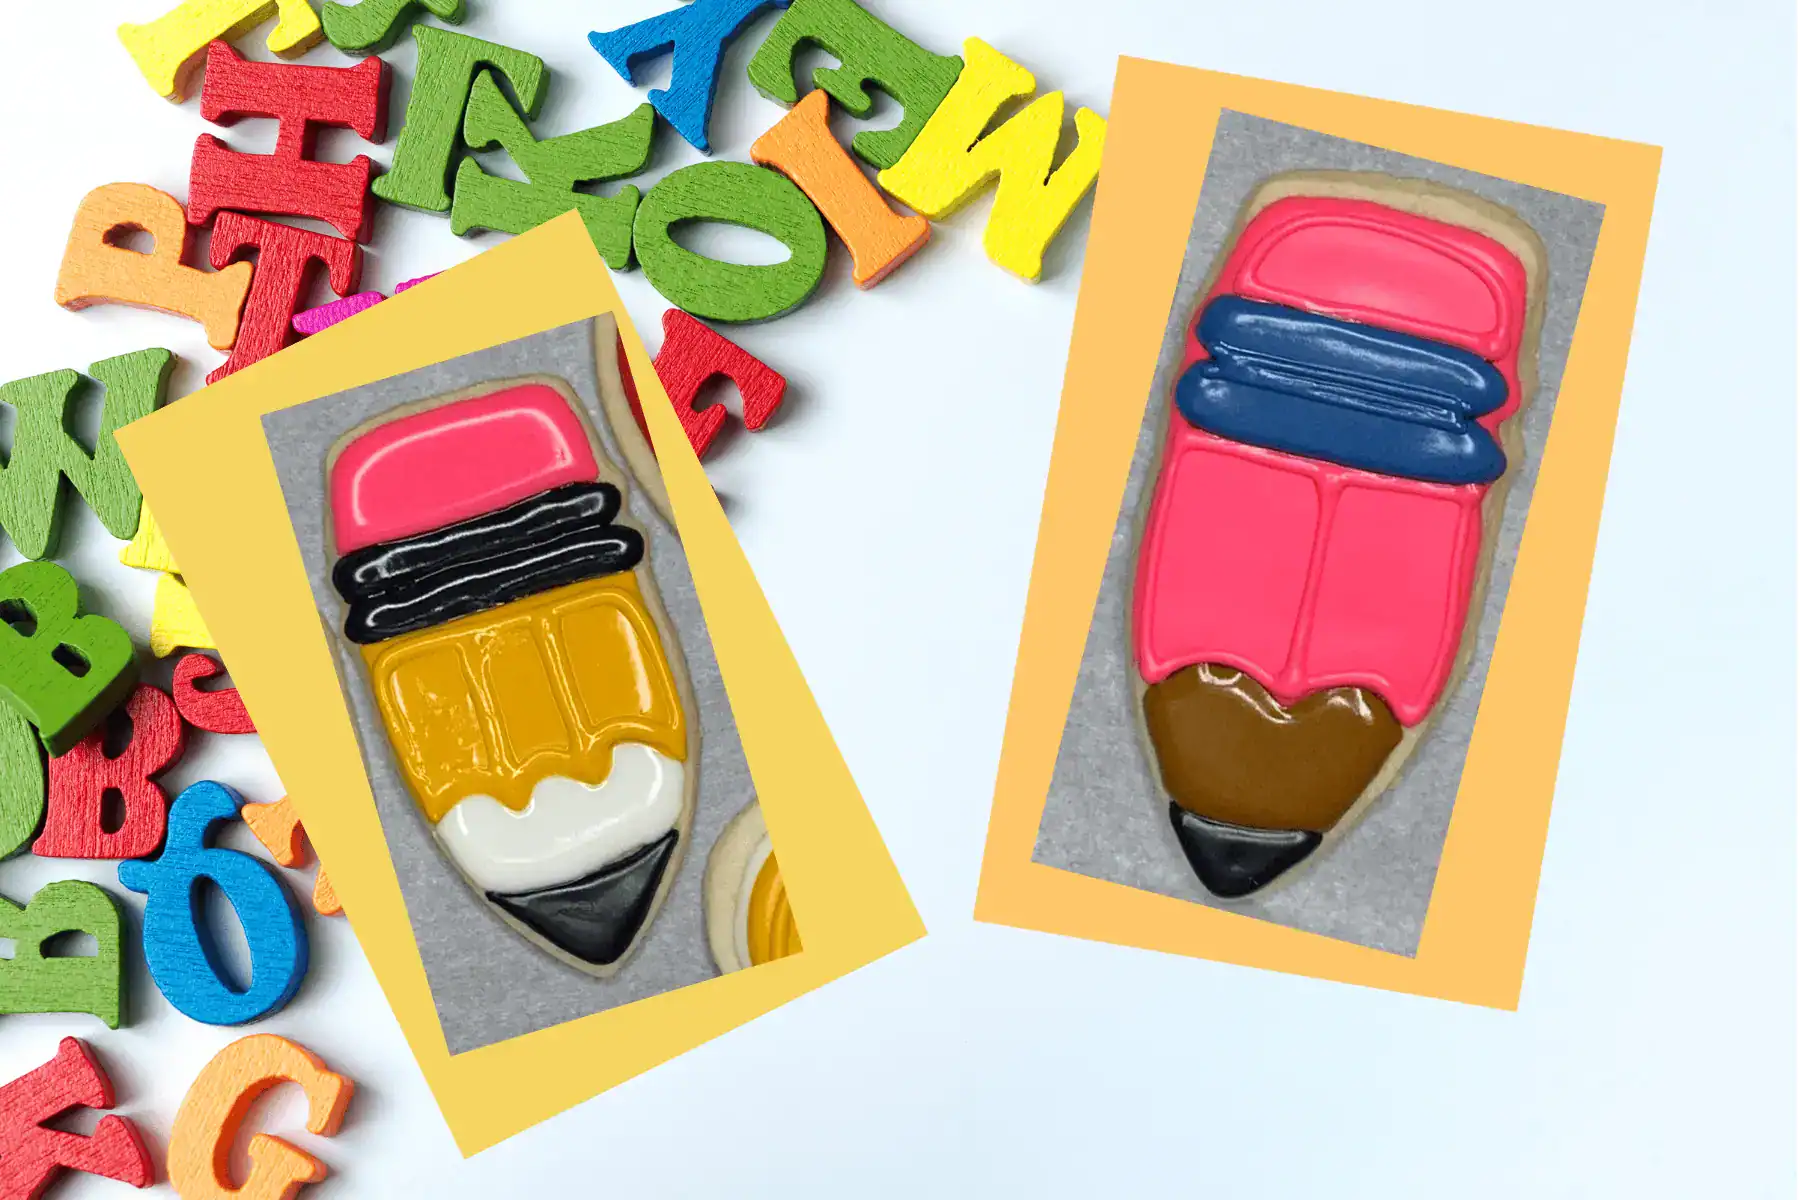
💕 Design #1: The Pink Pencil Cookie (Easy–Intermediate Level)
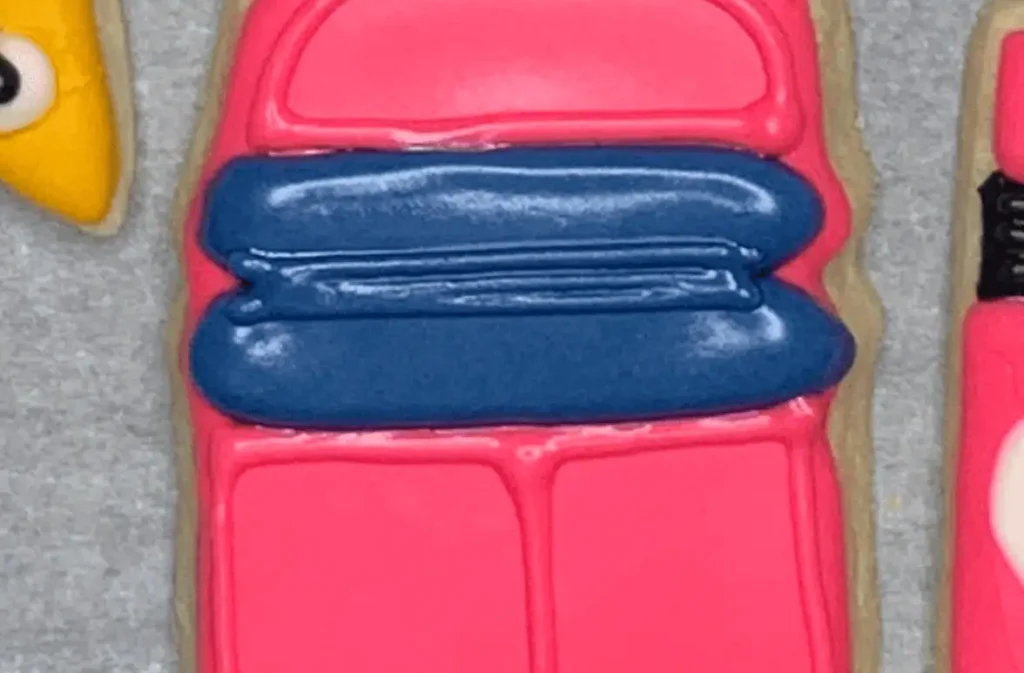
This cookie is shaped like a classic pencil—only cuter! And instead of the traditional yellow, I chose a trendy pink pencil because, well… SDS never misses a chance to add a little sparkle.
🛠️ What You’ll Need:
- Pencil-shaped sugar cookies
- Royal icing in the following colors:
- Pink (outline + flood) – pencil body + eraser
- Brown (outline + flood) – sharpened wood tip
- Black (outline + flood) – pencil point
- Blue (outline + flood) – metal bands
📝 Tip: For this design, I mixed only outline consistency for just the black icing. The sections are small enough that it works beautifully for both outlining and filling.
🎨 Step-by-Step Decorating Guide:
1. Start with the Pink Pencil Body
- Use the shape of your cookie as your guide.
- Outline the pencil from the eraser end to the wood-sharpened tip.
- Mimic the look of sharpening with two upside-down U shapes for the bottom edge.
- After outlining, scribble some pink icing into the center, then flood from the outer edges inward to prevent cratering.
2. Add the Pencil Tip
- Using black royal icing, outline and flood the pencil tip.
- Let everything sit to dry for at least one hour (longer is even better) before adding the next layers.
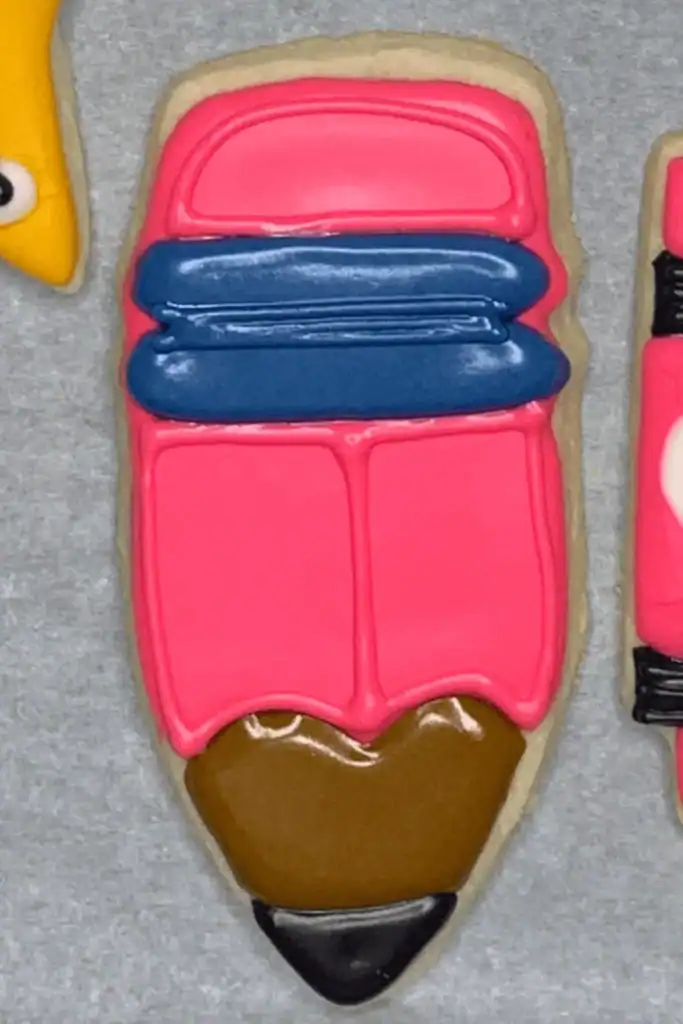
3. Decorate the Metal Bands & Eraser
- Using blue icing, outline and flood two horizontal ovals at the eraser end to create the metal bands.
- With pink icing, fill the eraser section (a small, rounded rectangle).
- Once dry, use blue icing to pipe three horizontal lines across the blue metal bands for added detail.
4. Fill the Wooden Tip Area
- Use your brown royal icing to outline and flood the sharpened wood section.
5. Final Details for Dimension
- With a #1 tip or fine cut on your piping bag, add vertical lines down the pink pencil body to give it that classic ridged texture.
- Outline the pencil edges and the eraser border to give the cookie extra pop and definition.
🎥 Watch It Happen:
🎬 Want to see this pink pencil come to life?

✏️ Classic Yellow School Pencil Cookie (Intermediate with SDS Flair)
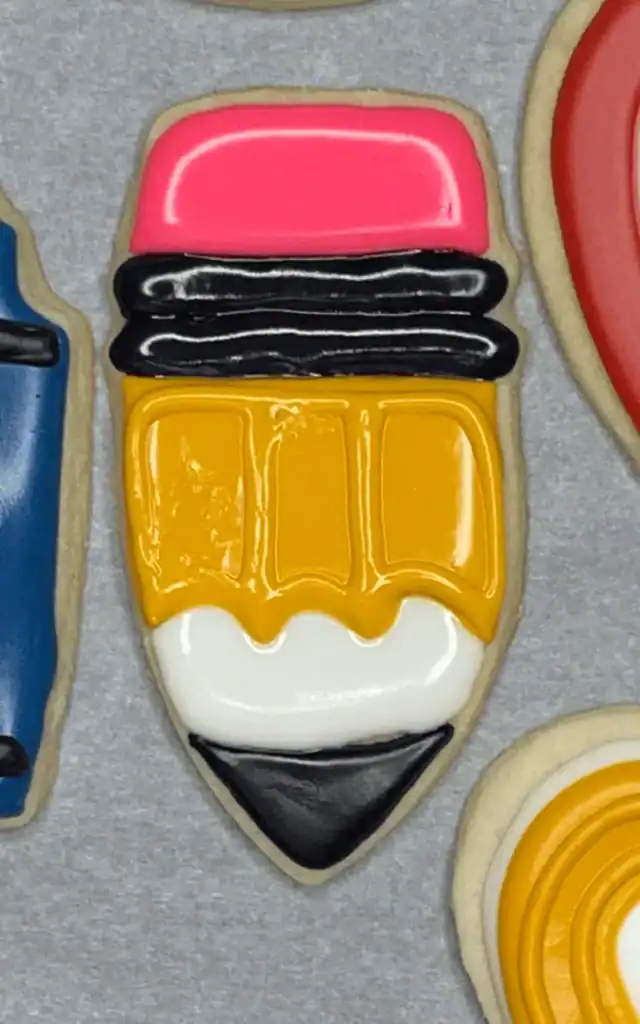
If the pink pencil was playful, this one is classic classroom cool. You’ll recognize this design instantly: bright yellow body, pink eraser, black tip—and just the right amount of SDS flair to give it personality.
This design uses the same pencil cookie cutter as the Pretty in Pink version, so once you’ve got the dough cut, baked, and cooled you’re ready to decorate both styles side by side!
🛠️ What You’ll Need:
- Royal icing in:
- Pink – for the eraser (outline + flood)
- School pencil yellow – for the body (outline + flood)
- White – for the wood/sharpened section (outline + flood)
- Black – for tip + metal band (outline only or outline + flood)
- Cookie cutter: pencil shape
- #1 tip or fine piping cut
- Thin metal spatula for transferring cookies
- Scribe or toothpick
- Soft-tipped paint brush (for those little oops moments)
📝 Step-by-Step Decorating Instructions:
1. Pink Eraser
- Start by outlining and flood filling the eraser in pink.
- Scribble some flood icing in the center before filling from the outer edges inward. This helps avoid that dreaded dip once it dries.

✨ Want to Dress Up Your Cookie Gifts?
Grab this free printable set of cookie tags and care cards in 3 gorgeous colors — perfect for gifting with a personal touch. Just sign up below and they’re yours!
2. Pencil Body
- Immediately after, outline and flood the yellow pencil section, leaving a blank space between the eraser and pencil body for the metal band.
- Be sure to stop before the wood and tip sections at the bottom.
3. Pencil Tip
- Outline and flood the pencil tip using black icing.
- Leave the wood area blank for now.
- Carefully move the cookie from your turntable or work surface to a drying sheet using a thin metal spatula.
- Let everything set for at least one hour (longer is better).
🎯 Next Steps: Details & Dimension
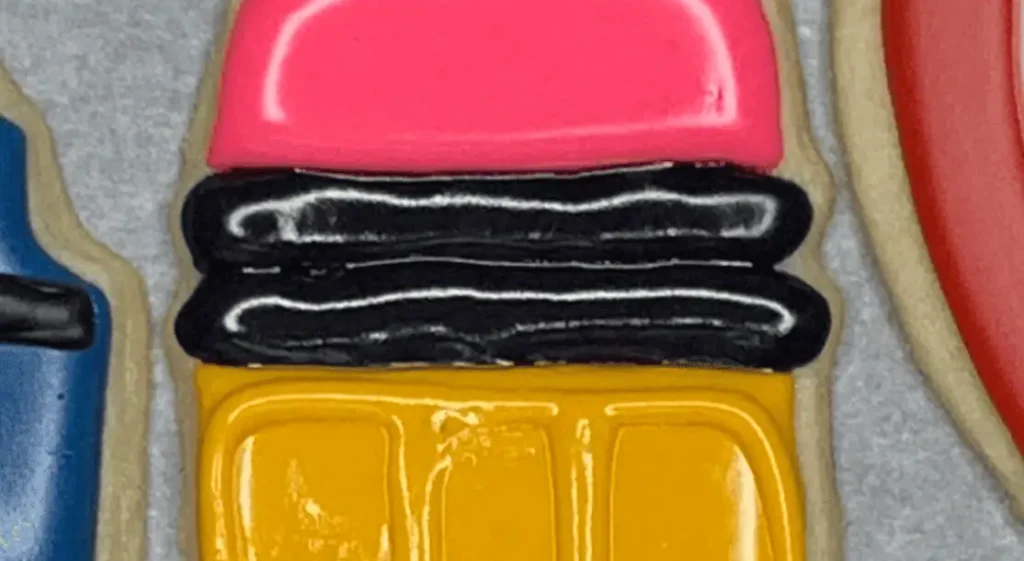
4. Metal Band (Black Ovals)
- Once your base has dried a bit, outline and flood a rounded rectangular band near the eraser using black icing.
- Let it partially set before adding the second band just below it. (If they accidentally run together, no worries! Scroll down to the rescue tip.)
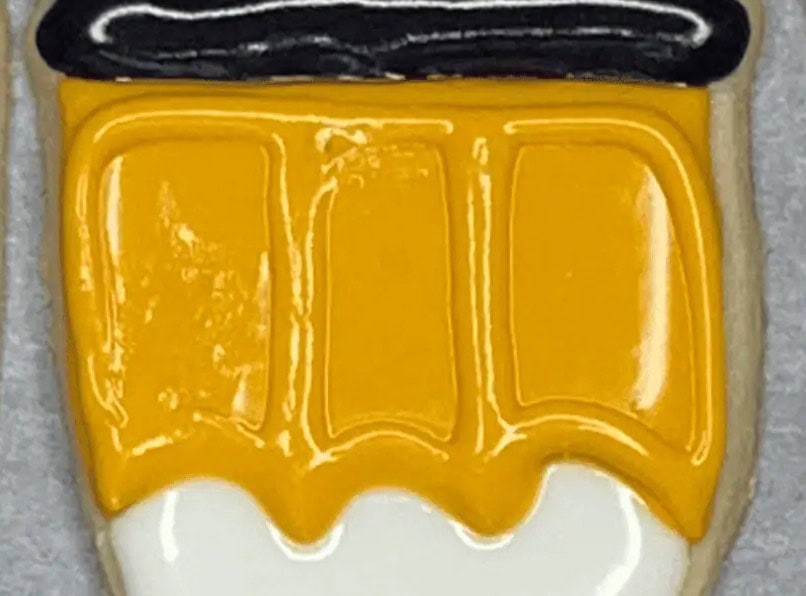
5. Wood Section
- Between the yellow pencil and black tip, fill the sharpened wood section with white icing.
- I chose white instead of brown because it made the surrounding colors pop—and I loved the contrast!
✨ Final Details (Where SDS Shine Happens!)
6. Yellow Line Work
- Use your yellow outline icing to add pencil ridges and edge lines.
Note to self: Don’t accidentally grab the flood bag like I did! 😂
But hey—it happens. If you do, the lines will just be a little puffier. It’s still cute!
7. Oops Rescue Tip
- Made a little line where you didn’t mean to? I sure did 🙂
Grab a soft-tipped paintbrush, lightly moisten the tip (dab off excess water), and gently brush out the oops.
It may take a couple of swipes, but this method works well for small mishaps. Is it perfect, hardly. But, it’s much less noticeable and after all, we are just going to eat the cookie 🙂
8. Optional Detailing
- If your black metal bands stayed separated—great, you’re done!
If they ran together, just use a black outline bag to add horizontal detail lines so it still looks polished and dimensional and hey, you meant it to be that way, right.
✏️ Back-to-School & Sweet as Ever
Explore the full roundup of school-themed cookie fun!
🎥 Watch the Classic Pencil Cookie Tutorial
Unlock Your 51 Page “Free” Sugar Cookie & Royal Icing Toolkit Today!

The Beautiful, printable Sugar Cookie & Royal Icing recipe cards are included inside your FREE Toolkit — Grab it for the prettiest version to save, print, or add to you binder 🍬✨
Say Goodbye to baking stress and Hello to Cookie Perfection. You’ll receive your comprehensive toolkit filled with recipes and guides to transform your Cooking-Making Experience
Your Toolkit is just a click away!
🧁 SDS Real Talk:
Decorating cookies is part art, part science, and totally forgiving. Mistakes happen—and sometimes they turn out even cuter than you planned. Whether you’re making these for your child’s first day back, a favorite teacher, or just for fun, remember: you’re doing great.
🧁 Helpful Hints:
- Use thicker outline icing for sections where you want puffiness (like the pencil body).
- Let each layer dry before adding new sections—especially when working with dark colors like black and blue.
- A scribe or toothpick helps even out any tiny icing bubbles.
- Color and thin the consistency of you royal icing the night before you plan to use it. This helps colors pop and minimizes air bubbles. In temps of 80 degrees and below I allow the royal icing to rest on the counter top until I’m ready to use it the next morning/day.
- After flooding, I carefully moved each cookie from my decorating turntable (lazy susan) or work surface to a drying rack using a thin metal spatula. Works like a charm!
🎥 Watch It Happen:
🎬 Watch me decorate this classic pencil!
Until the next back-to-school post, keep decorating, keep creating, and remember: it’s not about perfect—it’s about playfully delicious cookies! 💖✏️
pin & Share!