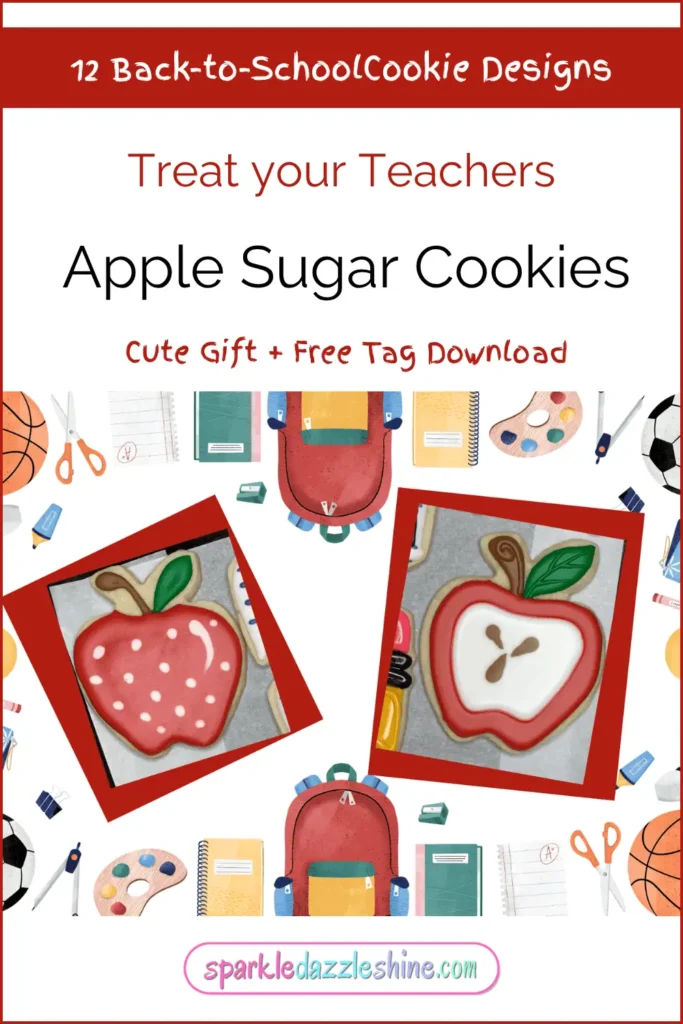
Apple Sugar Cookies
🍎Classic Back-to-School Treats with a Sweet Twist
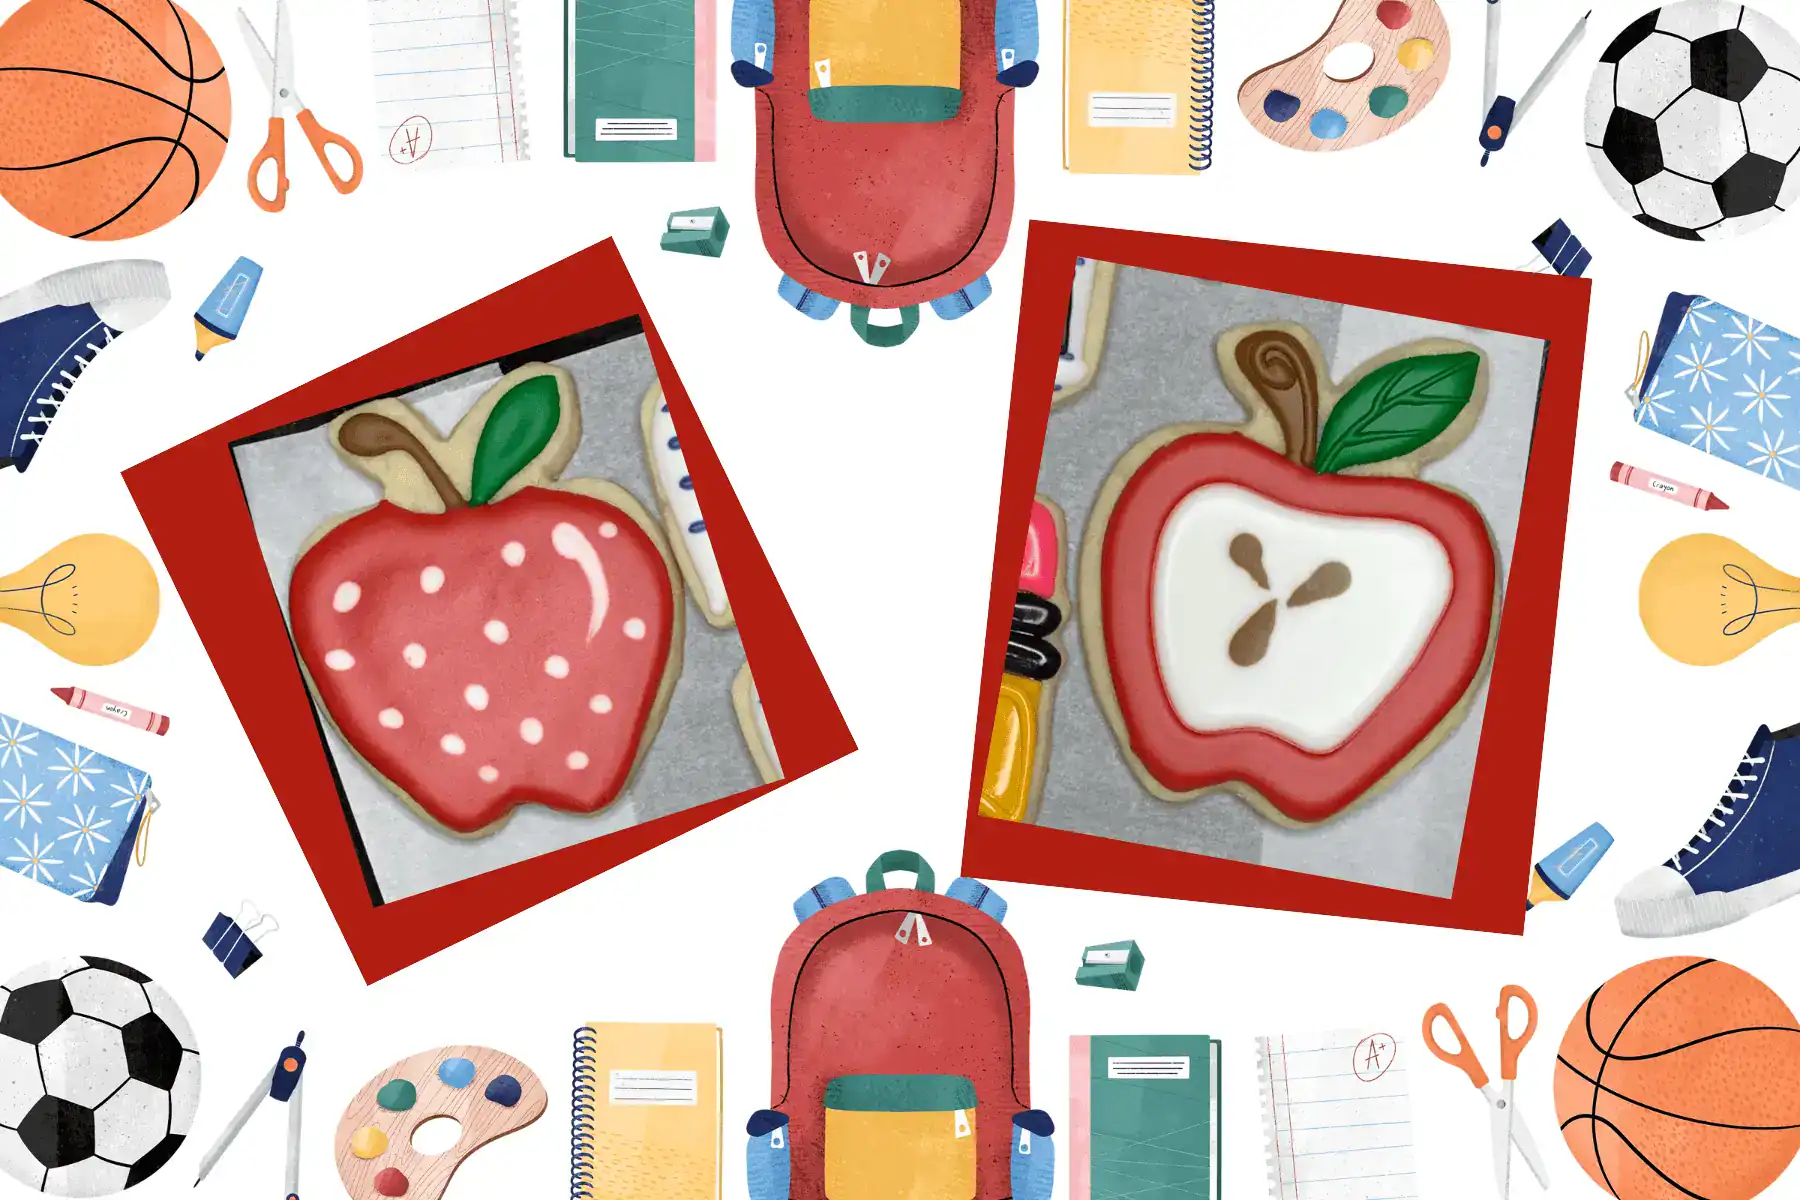
Nothing says “back-to-school” quite like a bright, shiny apple on the desk—or in this case, on a cookie! These apple-shaped sugar cookies are the definition of school-time sweetness, and today I’m sharing two fun designs: one super simple (with playful polka dots!) and one a bit more advanced, with a “sliced-in-half” look.
Whichever you choose to make, both are absolutely adorable and full of that nostalgic school charm we all love.
❤️ Apple Cookie #1: Simple Polka-Dot Apple (Beginner-Friendly)
This design is perfect for beginners, quick bakes, or anyone looking to create something delightful without all the fuss. It’s cheerful, classic, and always a crowd-pleaser!
🍏 What You’ll Need:
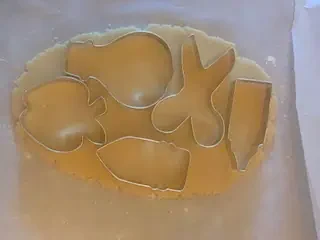
- Apple-shaped cookie cutter
- Baked and cooled sugar cookies
- Royal icing in outline and flood consistency:
- Red
- Green
- Brown
- White
📝 How to Decorate:
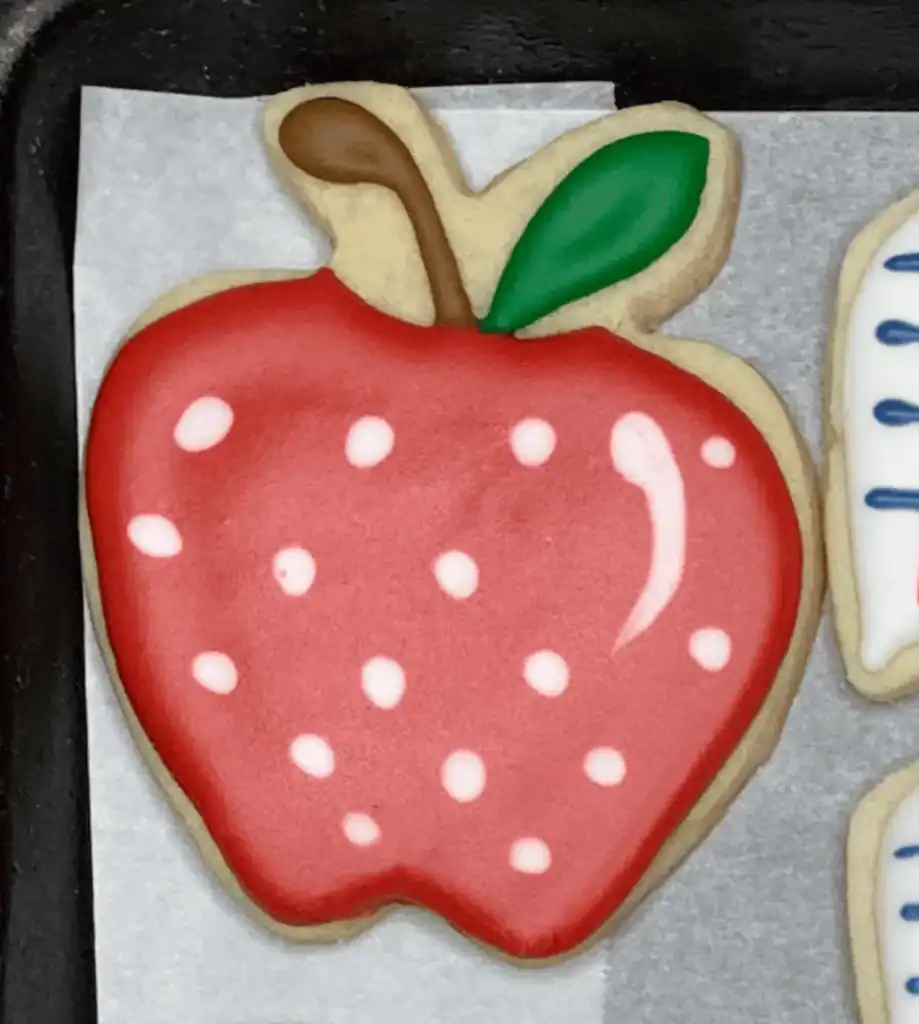
- Outline the Apple:
Using red outline icing, outline the apple’s shape, but leave room at the top center for the leaf and stem. To do this, curve the outline downward slightly at the top to create space for those features. - Flood the Apple:
Fill the red area using your flood consistency icing. Begin at the outline and work your way toward the center. Add a small scribble of icing first to help prevent the center from sinking as it dries. - Add the Stem & Leaf:
With brown and green outline+flood icing, pipe and fill a small stem and a simple green leaf at the top of the apple. - Highlight the Shine:
On the upper right curve of the apple, add a small white teardrop shape using flood icing to mimic a glossy shine. - Dot with Whimsy:
While the red icing is still wet, add white dots—large or small—for a wet-on-wet polka dot effect. Be sure to hold your piping bag straight up and down (not angled like I had to do for filming!) for best results. - Let Dry:
Use a thin metal spatula to gently transfer your cookie to a drying rack. Let it dry for at least one hour, preferably more.
🎥 Watch the full polka-dot apple cookie video tutorial here:
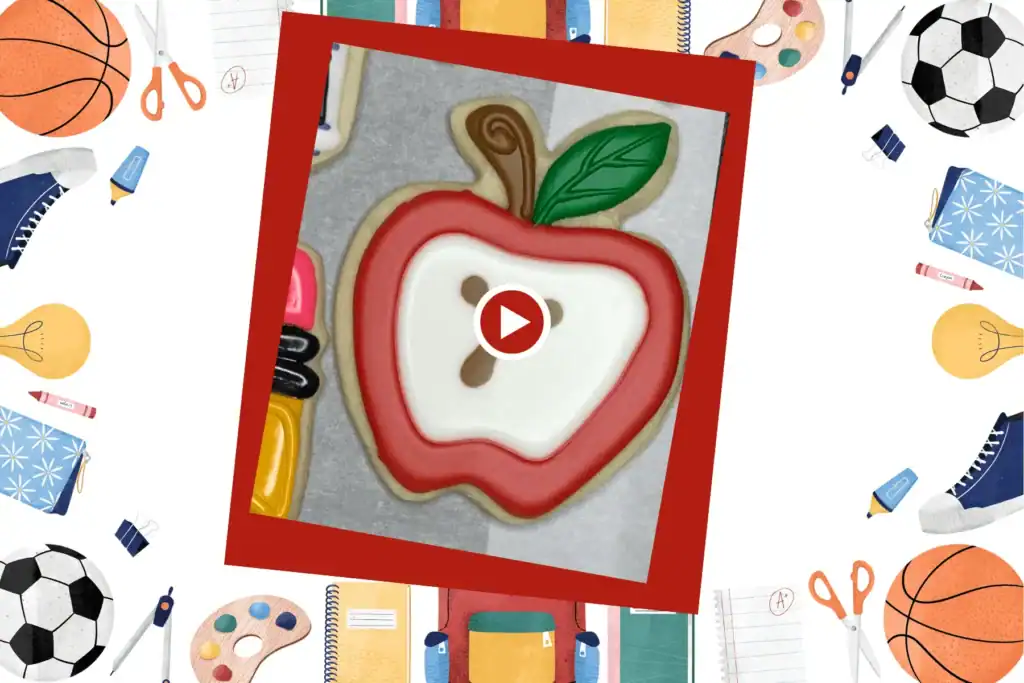
🍎 Apple Cookie #2: Sliced Apple (Intermediate)
This next apple design takes things a step further and creates the illusion of a vertically sliced apple—red skin on the outside, a white center, and brown seeds tucked inside. It’s perfect for adding variety to your cookie platter!
🛠️ What You’ll Need:
- Apple cookie using a apple cookie cutter (same as above)
- Royal icing in outline and flood consistency:
- Red
- White
- Green
- Brown
✨ Step-by-Step Instructions:
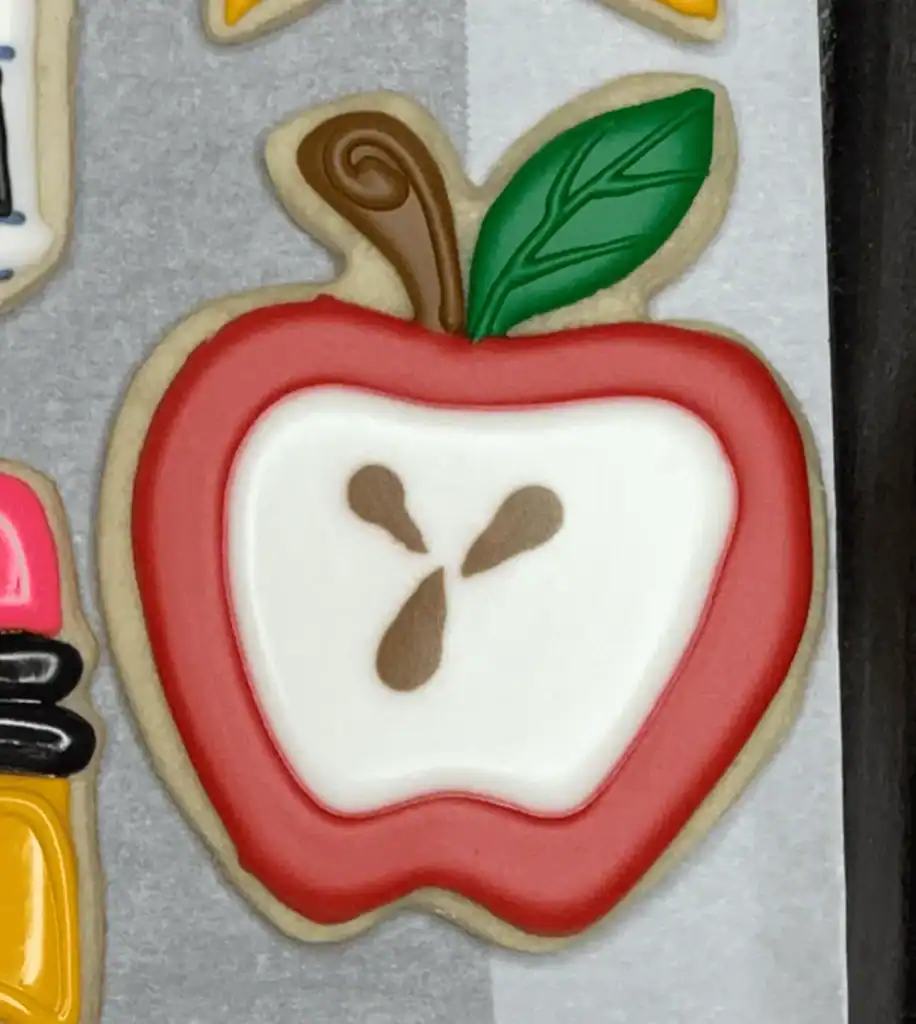
- Outline the Apple:
Use red outline icing to create the shape of the apple. Then, just inside that outline, create a second inner outline, leaving a border that represents the red skin of the sliced apple. - Flood the Apple Skin:
Using red flood icing, fill the area between the outer and inner outlines. This creates a beautiful band of “apple skin.” - Add the Leaf & Stem:
Pipe a larger, more dimensional stem in brown royal icing, and a full green leaf just to the side of it. Flood both and allow to dry. - Let It Set:
Once everything is piped, gently transfer the cookie to your drying rack with a spatula. Let dry for at least one hour—especially before adding the center white fill.
✏️ Back-to-School & Sweet as Ever
Explore the full roundup of school-themed cookie fun!
🧁 Finishing the Sliced Look:
- Flood the Center:
Once the red icing is set, use white outline icing to trace the inside of the red band, then flood the center with white flood icing. (Pro tip: Scribble a little icing in the center before flooding to prevent concaving.)
✨ SDS Truth Time:
In my video, you’ll notice I didn’t outline before flooding—and while the result still worked, I recommend using the outline step for cleaner edges.
- Add the Seeds (Wet-on-Wet):
While the white center is still wet, use brown icing to pipe three small teardrop shapes in the center. Start with a small circle and drag your scribe slightly forward to form a point. - Final Leaf & Stem Details:
Once the cookie has set a bit, use brown outline icing to add dimension to the stem—try curling the top for a little flourish!
For the leaf, pipe a center vein and three side veins (two on one side, one on the other) to give it realistic texture.
🎥 Watch the sliced apple cookie decorating video here:
🎁 Don’t Forget the Free Printable!

✨ Want to Dress Up Your Cookie Gifts?
Grab this free printable set of cookie tags and care cards in 3 gorgeous colors — perfect for gifting with a personal touch. Just sign up below and they’re yours!
🍪 Timeless Treats
These apple cookies are a timeless favorite—and whether you go for the easy polka-dot version or the elegant sliced apple, they’re guaranteed to add a sweet little sparkle to your back-to-school celebrations.
Remember: Your cookies don’t need to be perfect to be meaningful. A wobble here or a smudge there doesn’t take away from the joy you’re giving—and it’s often those little quirks that make your cookies feel personal and loved.
So decorate with heart, laugh at your oops moments (I sure did!), and keep that icing bag flowing. You’re doing great. 💖
Pin & Share!!!