Playful Valentine Sugar Cookies
Playful Valentine Sugar Cookies are about letting creativity lead the way, mixing color, sparkle, and simple techniques to create beautiful Valentine cookies without the pressure of perfection or hours of royal icing.
Disclosure: This post may reference products used in our kitchens. We do not currently have any affiliate relationships. If that ever changes in the future, We’ll always disclose it clearly.
Valentine’s cookies don’t have to be complicated to feel special. This year, we wanted to explore playful patterns, soft color, and just enough sparkle to make these cookies feel joyful and inviting—cookies that encourage you to experiment, make a mess, and enjoy the process as much as the final result.

These designs were created using two batches of sugar cookie dough—one classic and one colored—combined in a variety of simple, creative ways. No advanced decorating skills required. Just curiosity, a rolling pin, and permission to play.
A Playful Approach to Valentine Sugar Cookies
The heart of these Playful Valentine Sugar Cookies is pattern, not precision. Instead of focusing on perfectly piped details, the designs come from how the dough itself is handled.
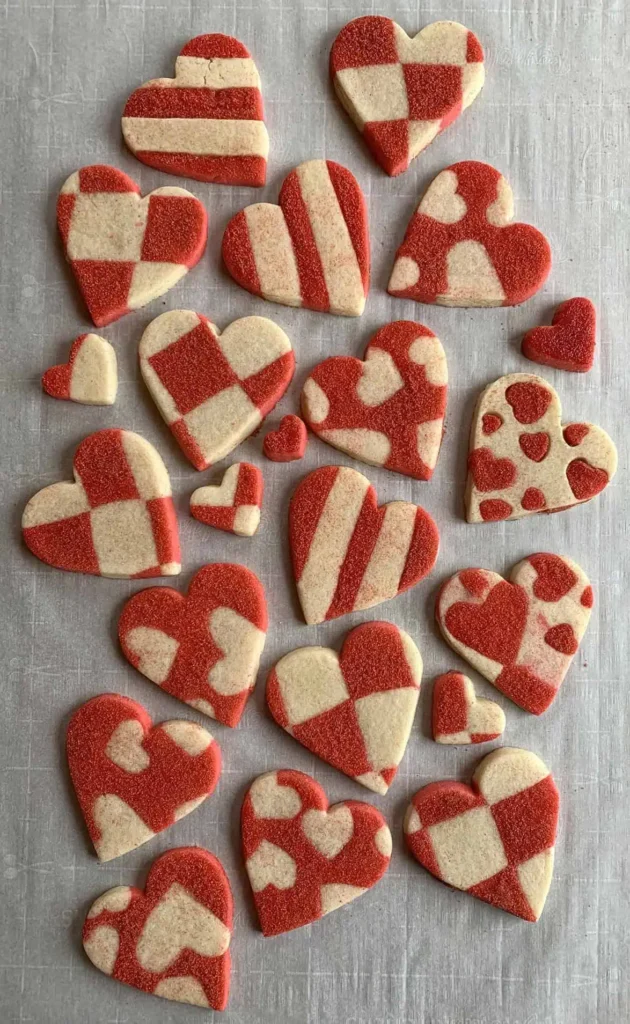
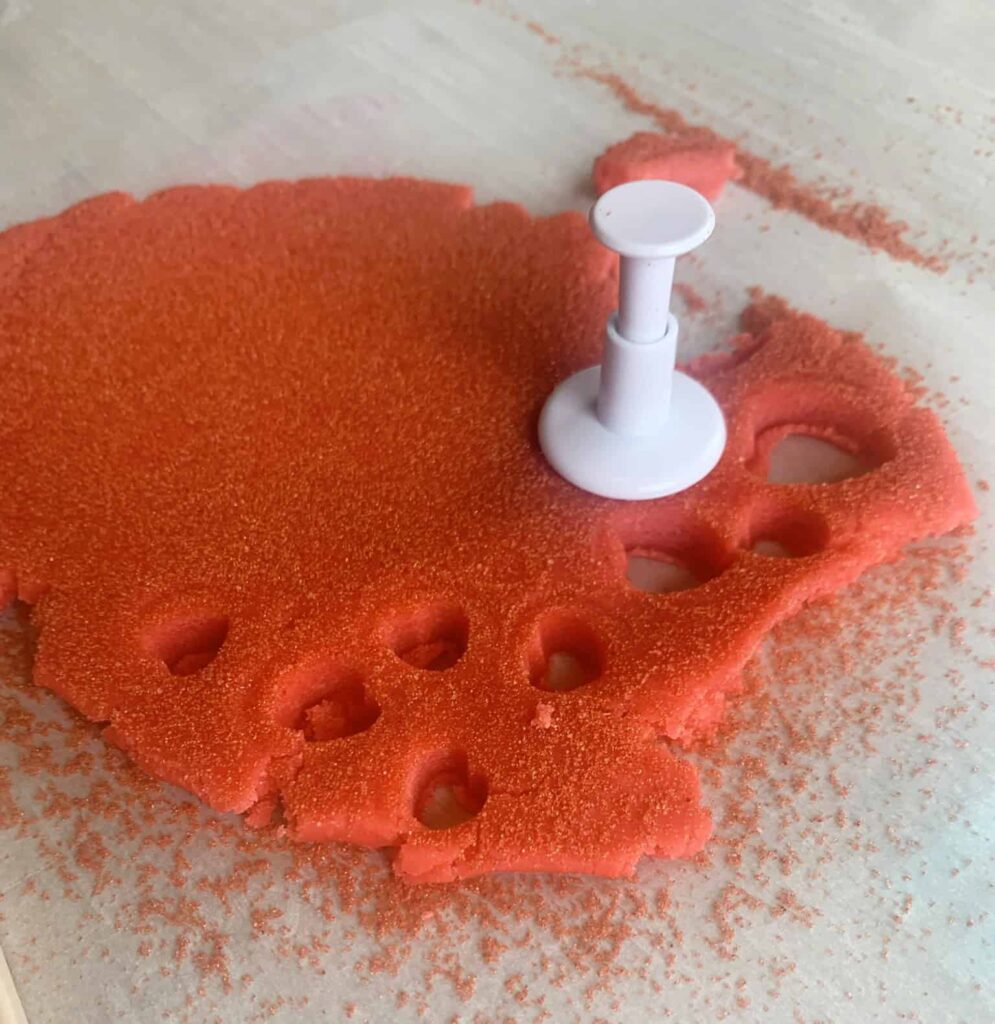
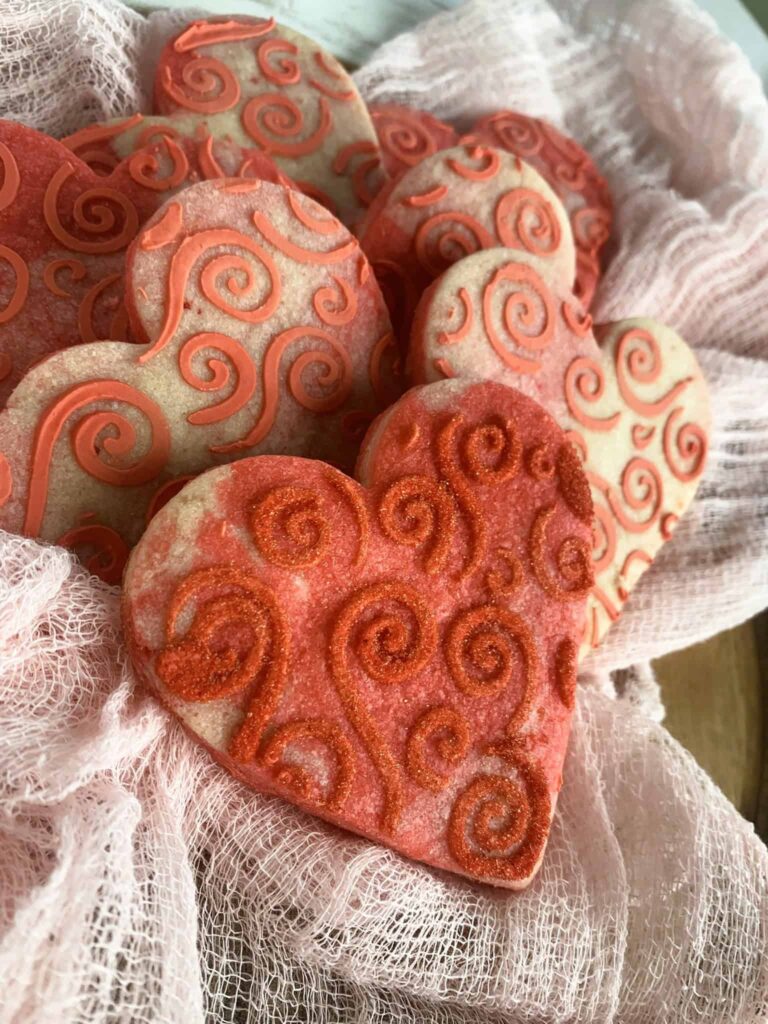
Stripes, soft marbling, heart inlays, and even “heart bites” all come from layering, rolling, and cutting the dough in different ways. Some patterns are intentional. Others happen by accident—and those often turn out to be the most charming.
This is the kind of cookie project that feels more like crafting than decorating, and that’s exactly the point.
Coloring Dough the Easy Way
If you’re coloring cookie dough, timing matters. For even color with minimal effort, add food coloring during the butter, egg, and vanilla stage of mixing. This allows the color to blend smoothly before the flour is incorporated and prevents streaking later.
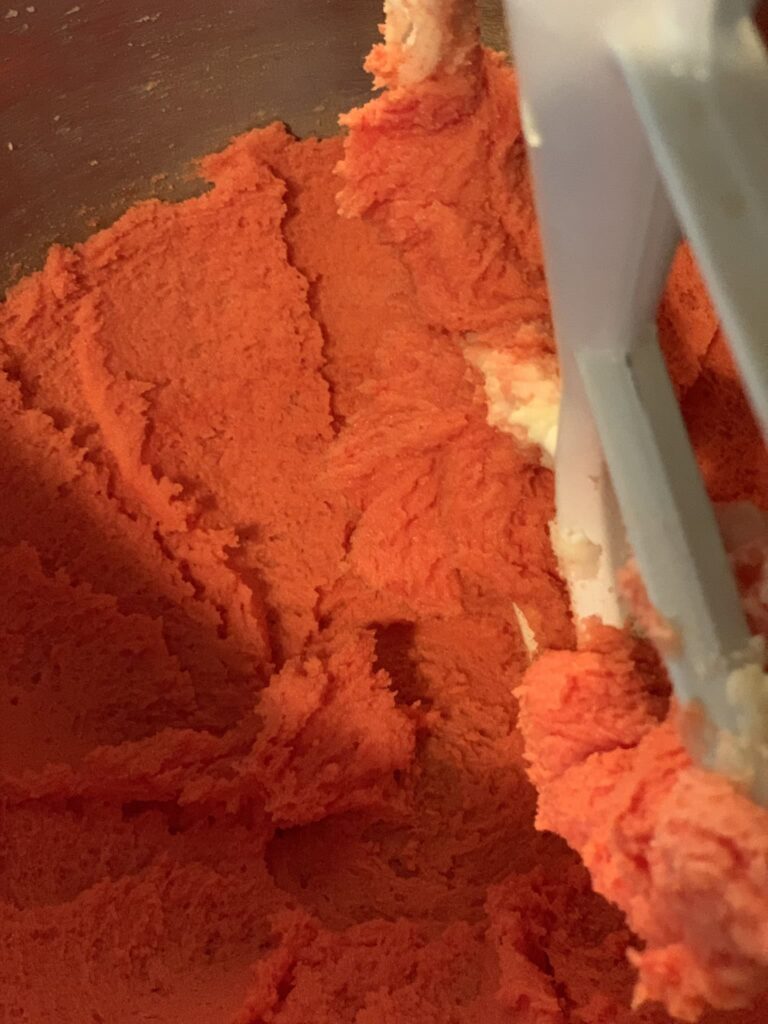
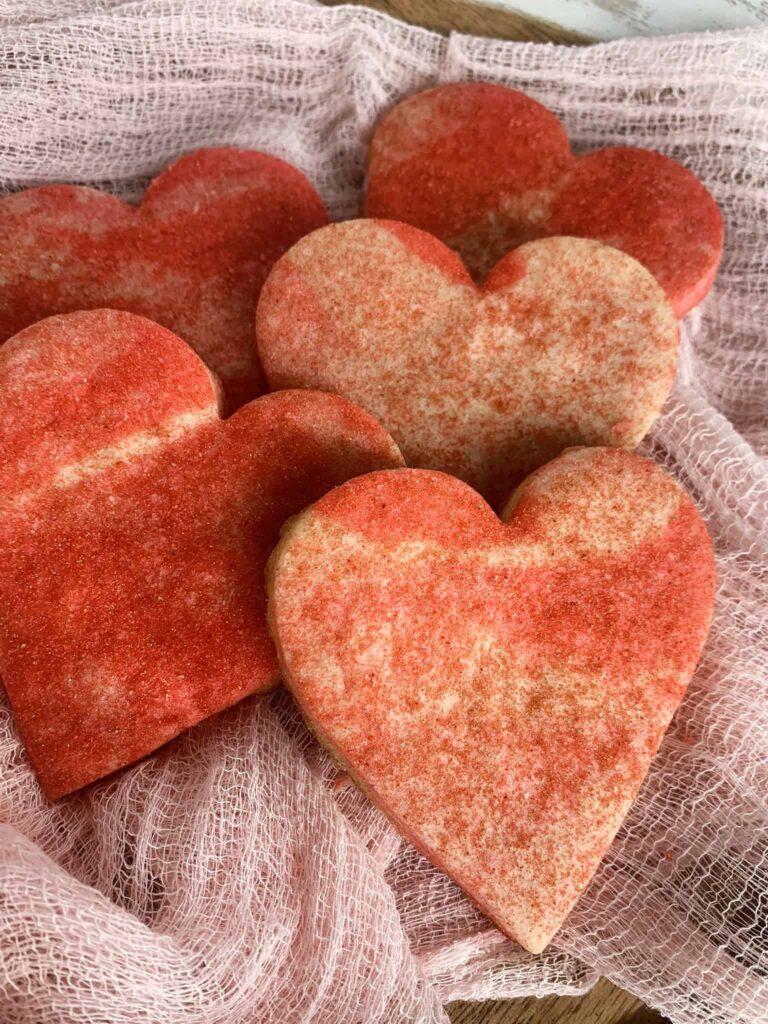
For this project, we used a soft red tone for contrast against the natural dough. You can keep it subtle or go bold—both work beautifully.
Making Your Own Sanding Sugar
Store-bought sanding sugar is convenient, but making your own is simple and gives you complete control over color.
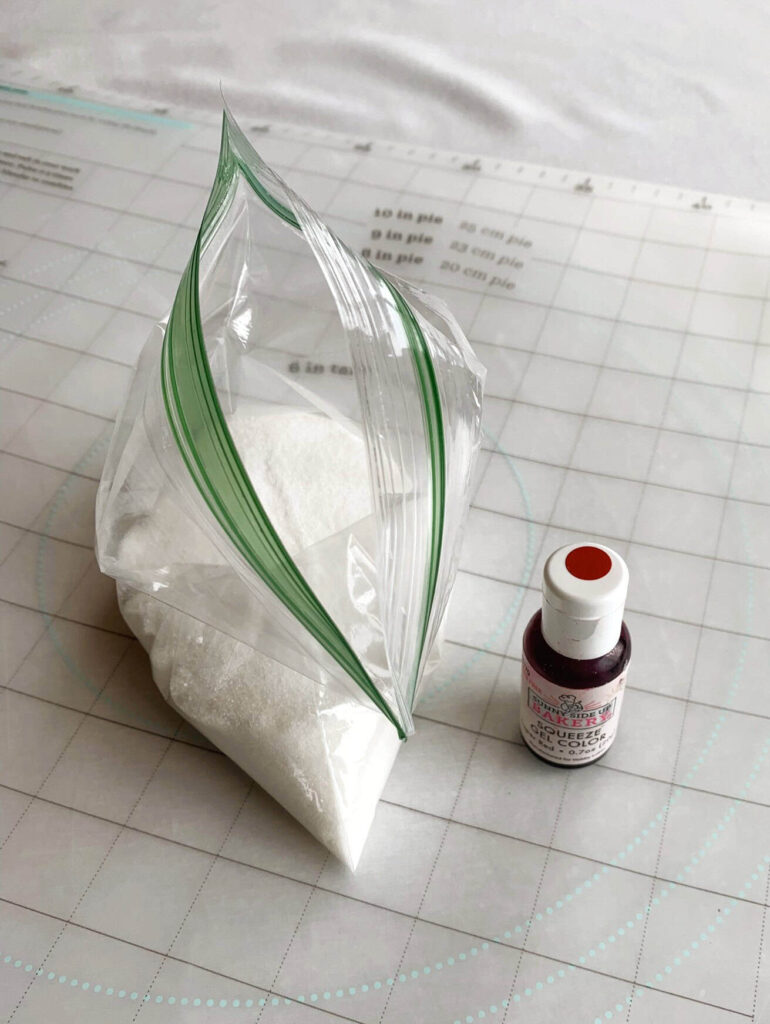
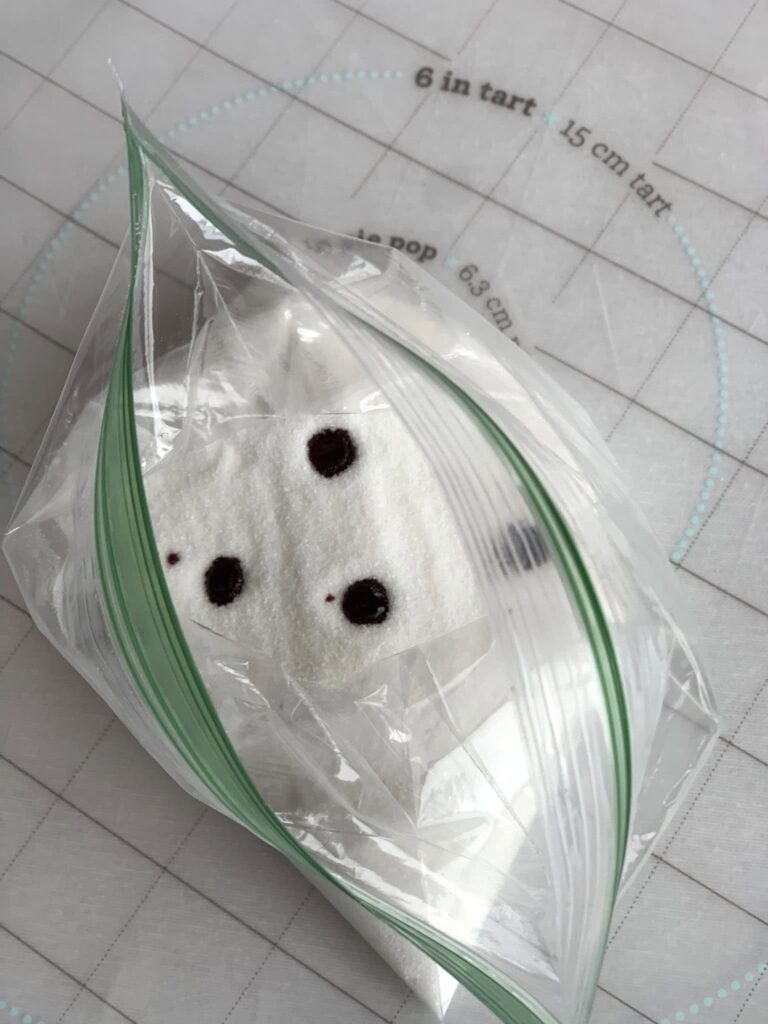
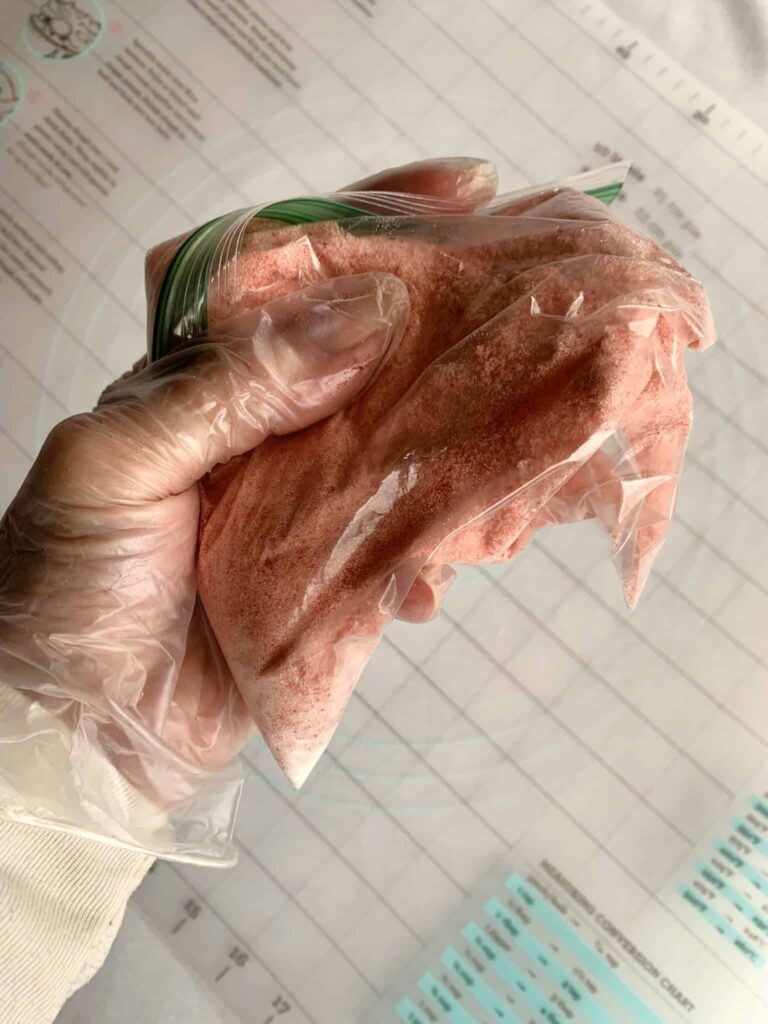
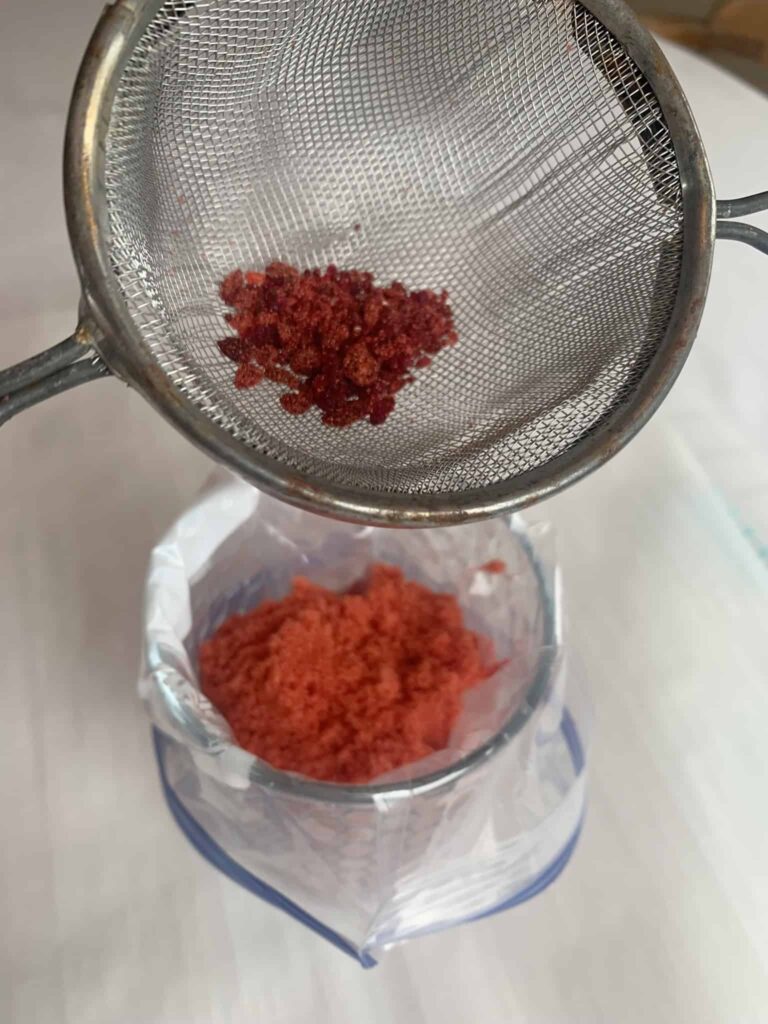
Add regular granulated sugar (or a coarser sugar, if you prefer) to a zip-top bag. Add just a few drops of gel food coloring, seal, and massage until evenly coated. Before using, sift the sugar to remove any clumps caused by excess color. This step makes a big difference in the final sparkle.
Adding Sparkle Before and After Baking
For extra shine, sanding sugar can be added in two different ways.
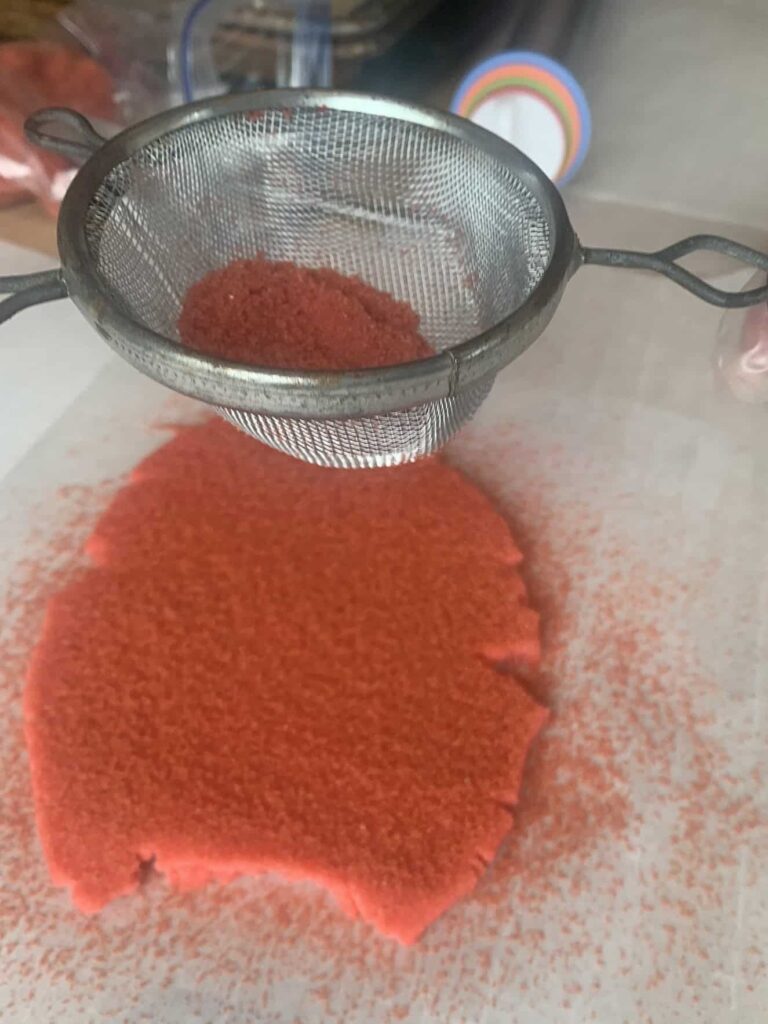
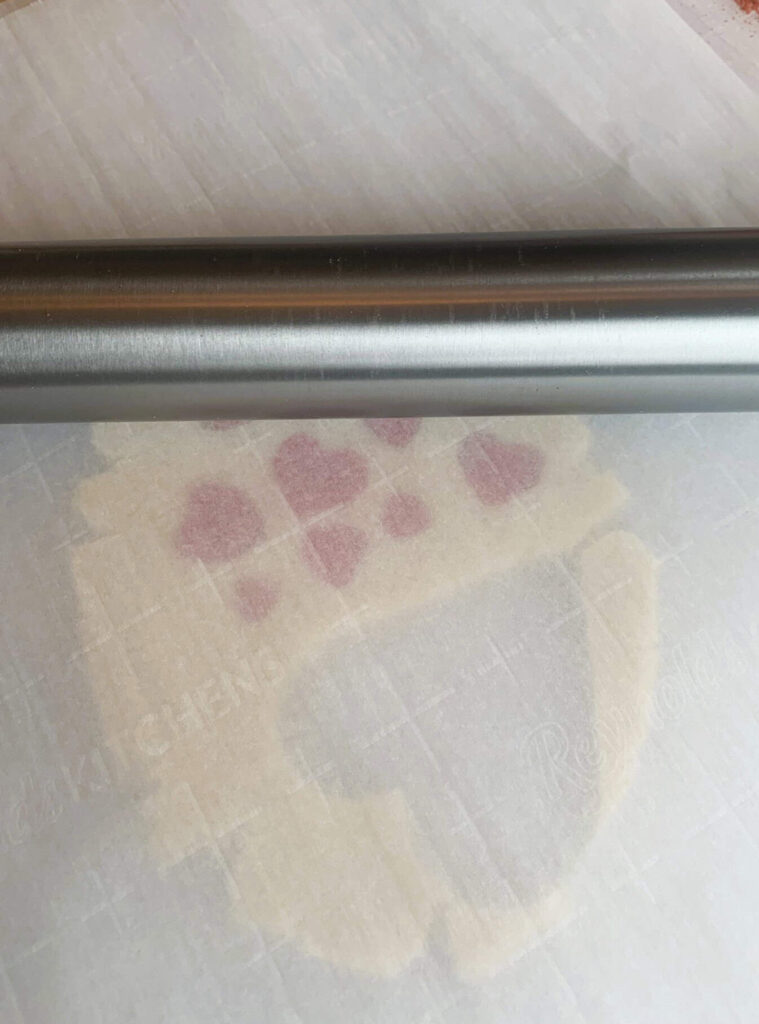
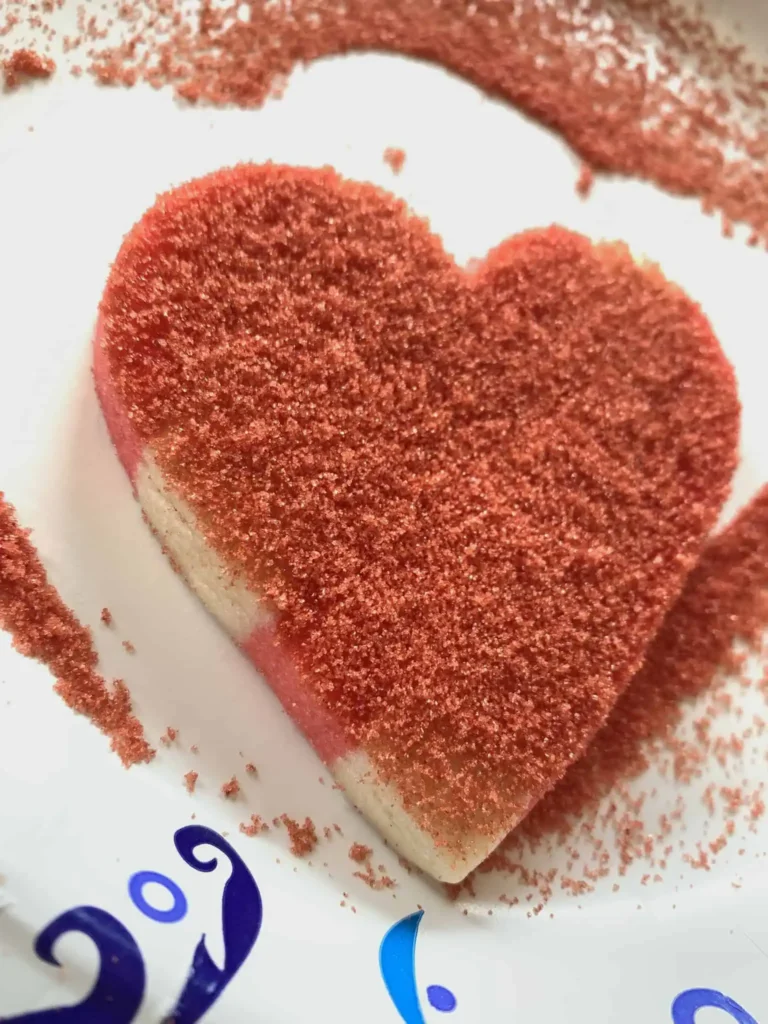
Before baking, sift sanding sugar directly onto rolled-out colored dough, then very lightly roll over it to help it adhere. A sheet of parchment between the dough and rolling pin keeps things neat.

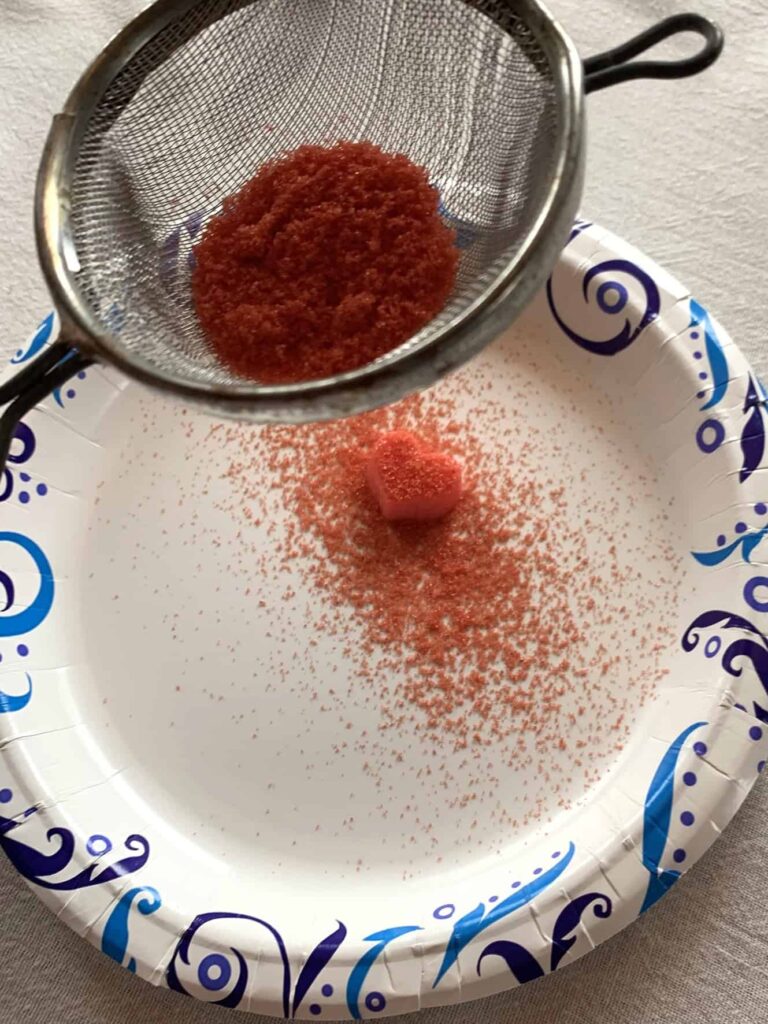
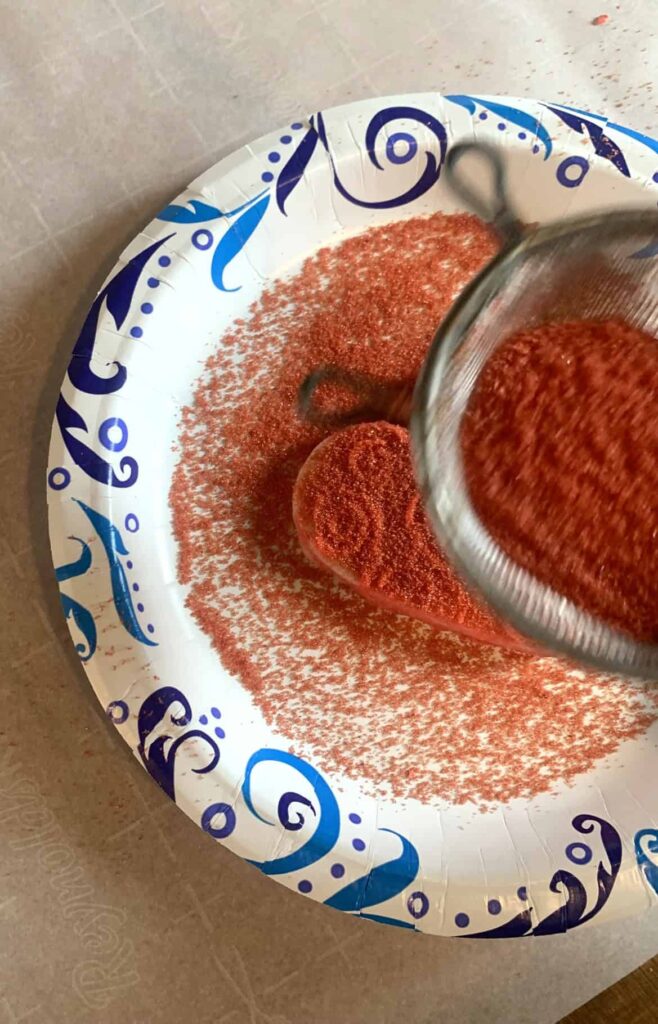
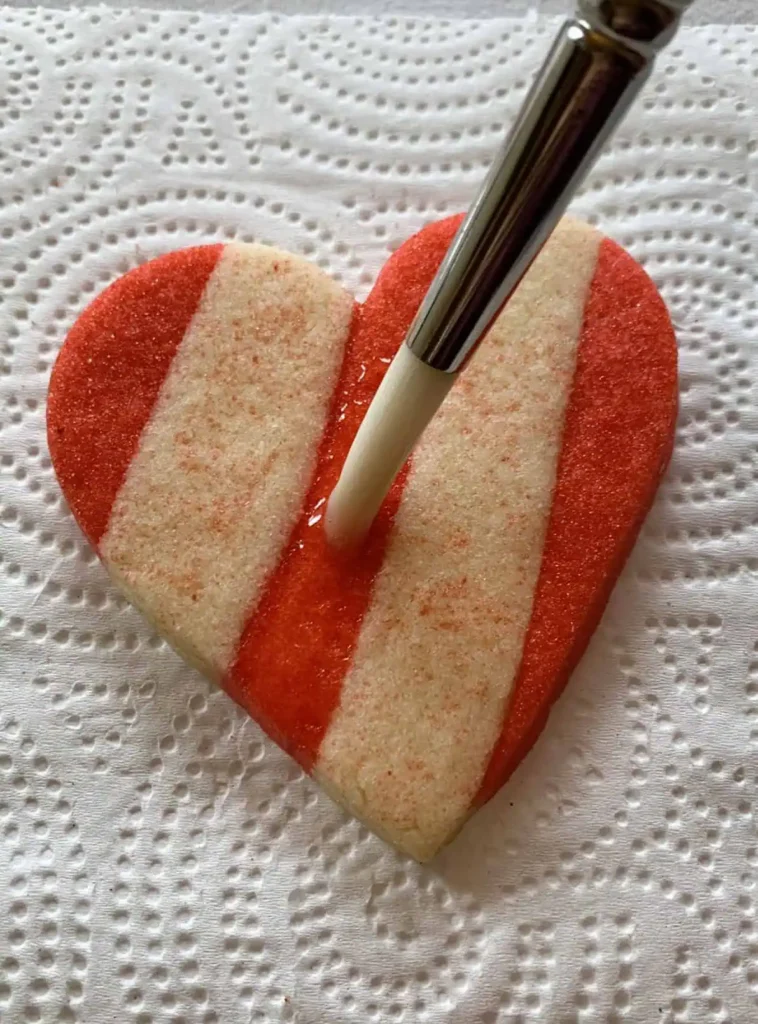
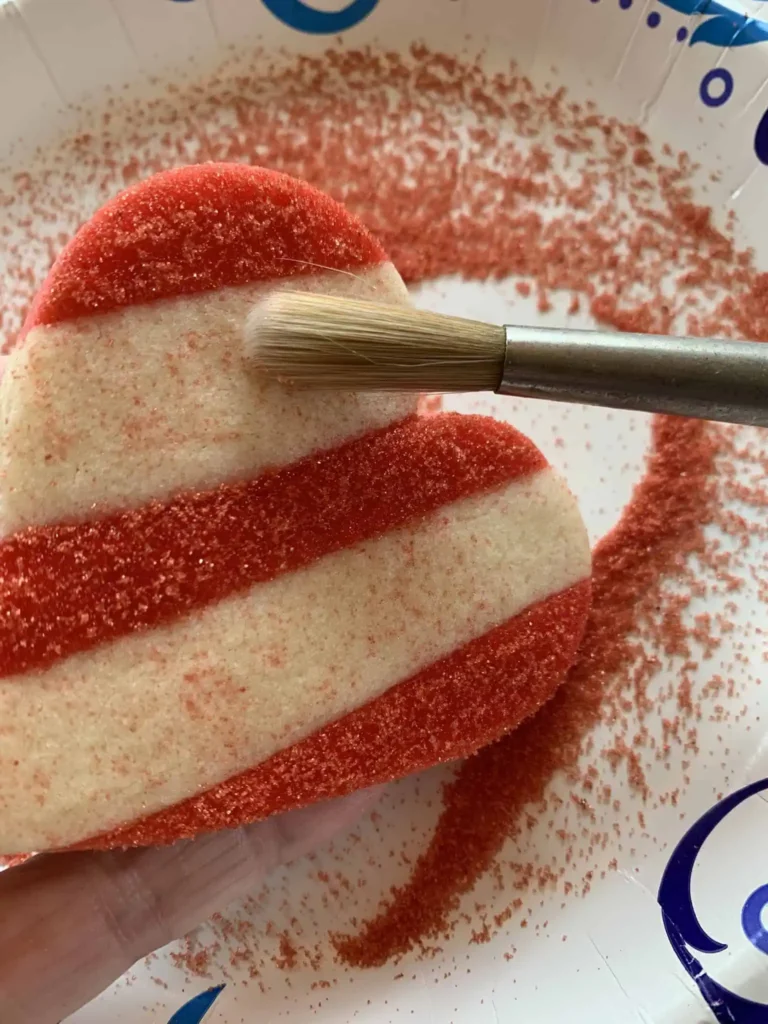
After baking and cooling, we added an optional finishing touch by brushing a very thin layer of lightly diluted corn syrup onto select cookies, then re-sprinkling with sanding sugar. Less is definitely more here—just enough to catch the light and enhance the sparkle without overwhelming the cookie.
Creating Playful Patterns
There’s no single “right” way to create patterns for these Playful Valentine Sugar Cookies. Here are a few that worked especially well:
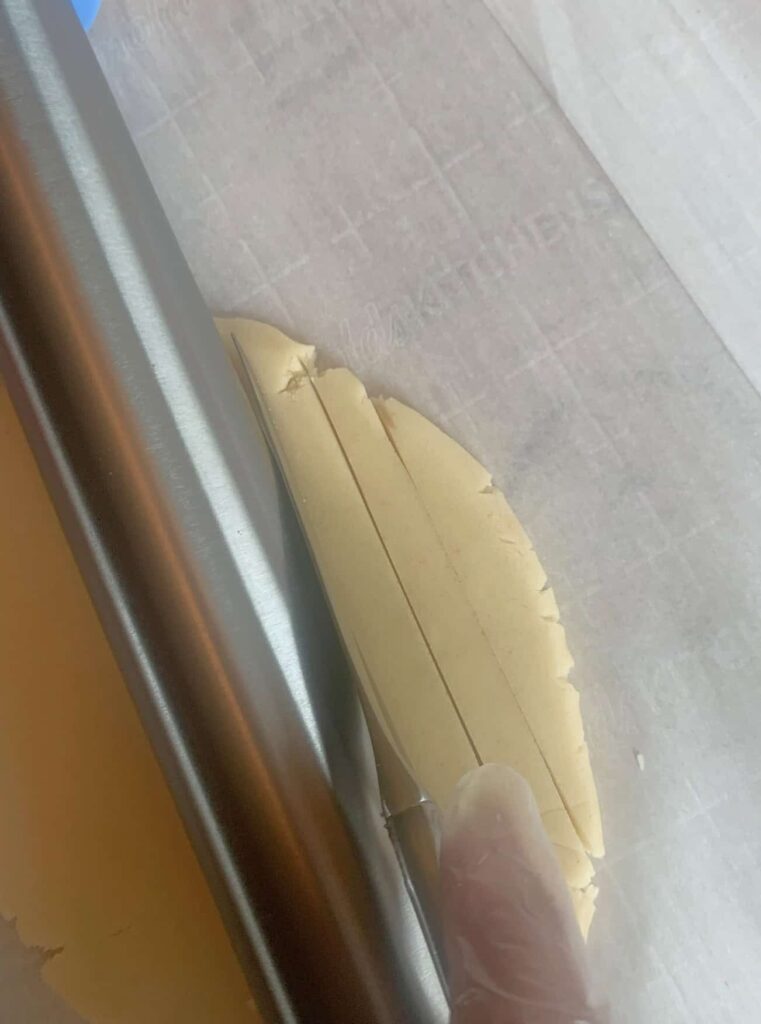
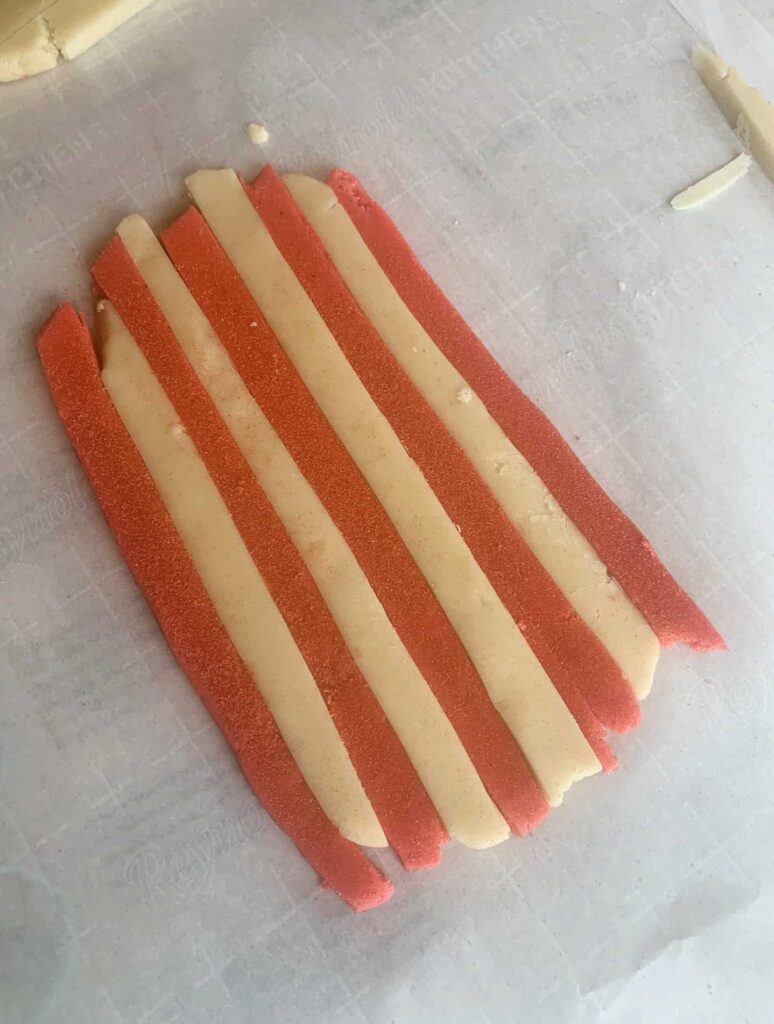
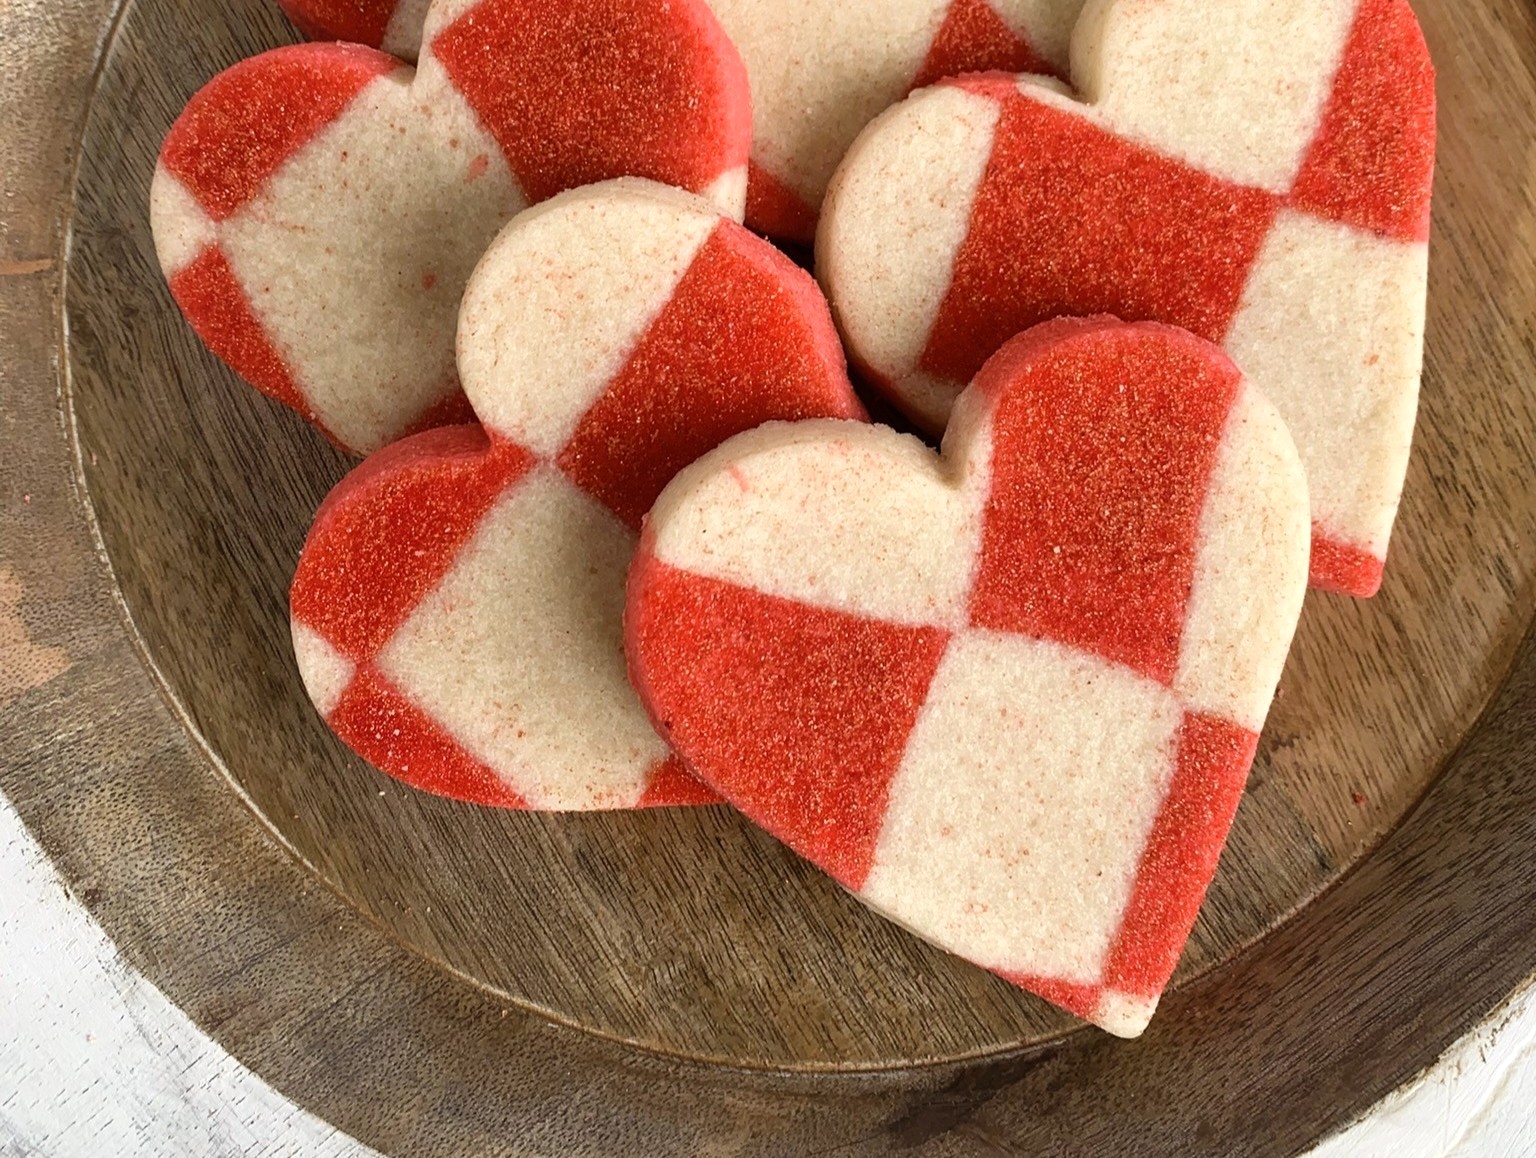
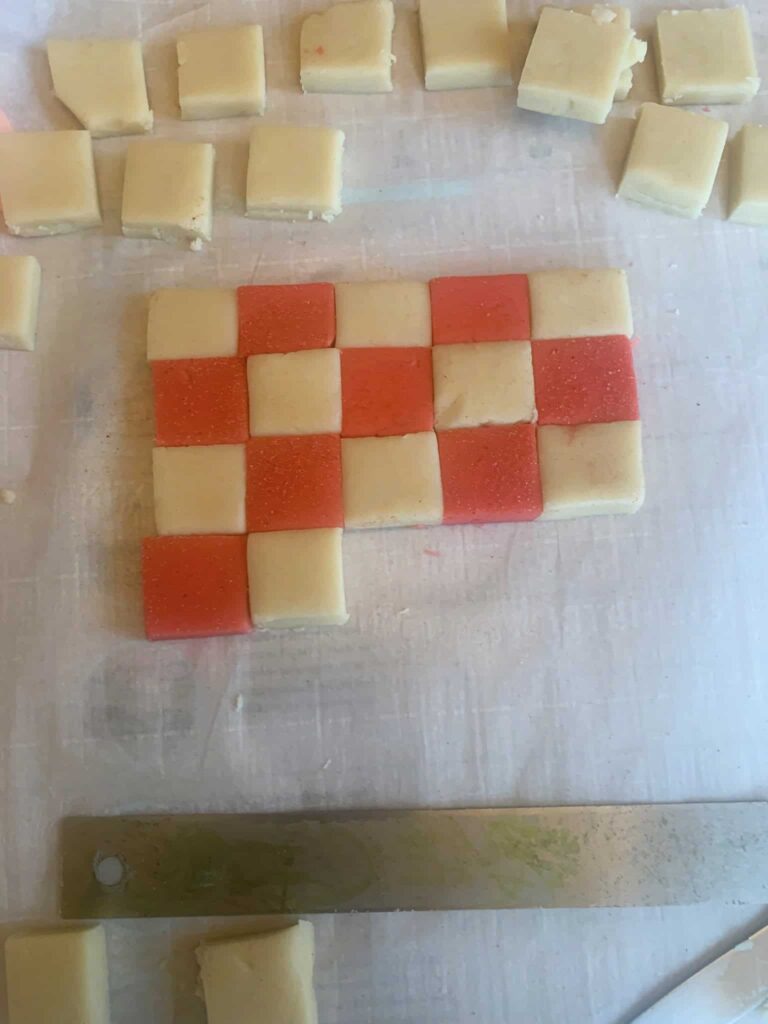
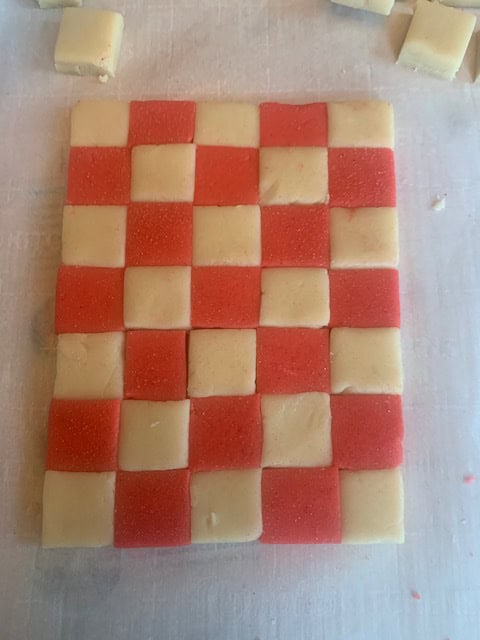
Stripes are created by cutting dough into strips and alternating colors before gently rolling them together. Checked or harlequin patterns use the same idea, just arranged differently.
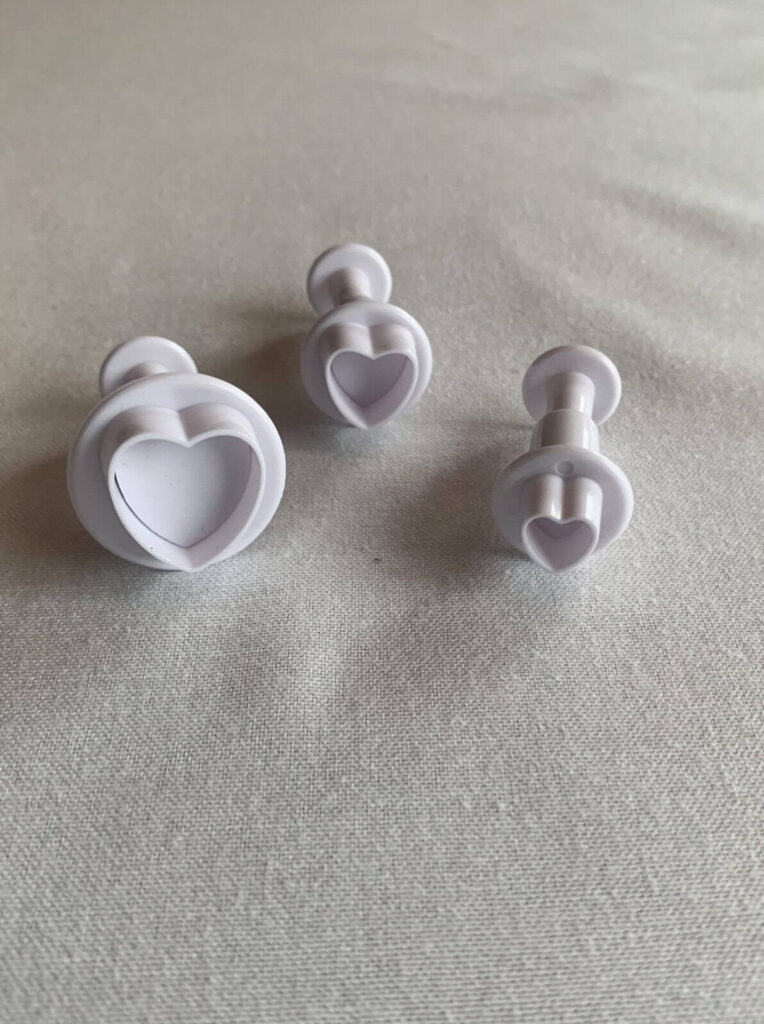

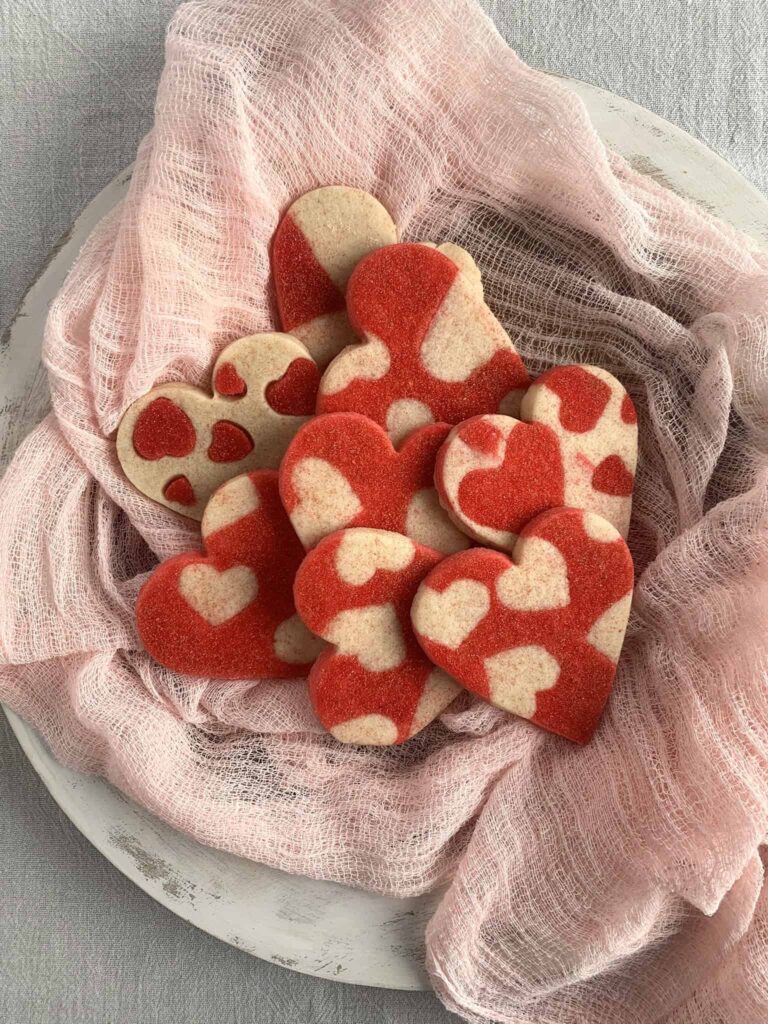
Heart inlays are made by cutting shapes from rolled dough and replacing them with contrasting pieces. Working from a full sheet of dough rather than individual cookies saves time and keeps things manageable.
Scrap dough can be gently brought together and rolled out again to create a soft marbled effect. These cookies are unexpectedly beautiful and don’t need sanding sugar at all. A small accent of royal icing adds just enough polish.
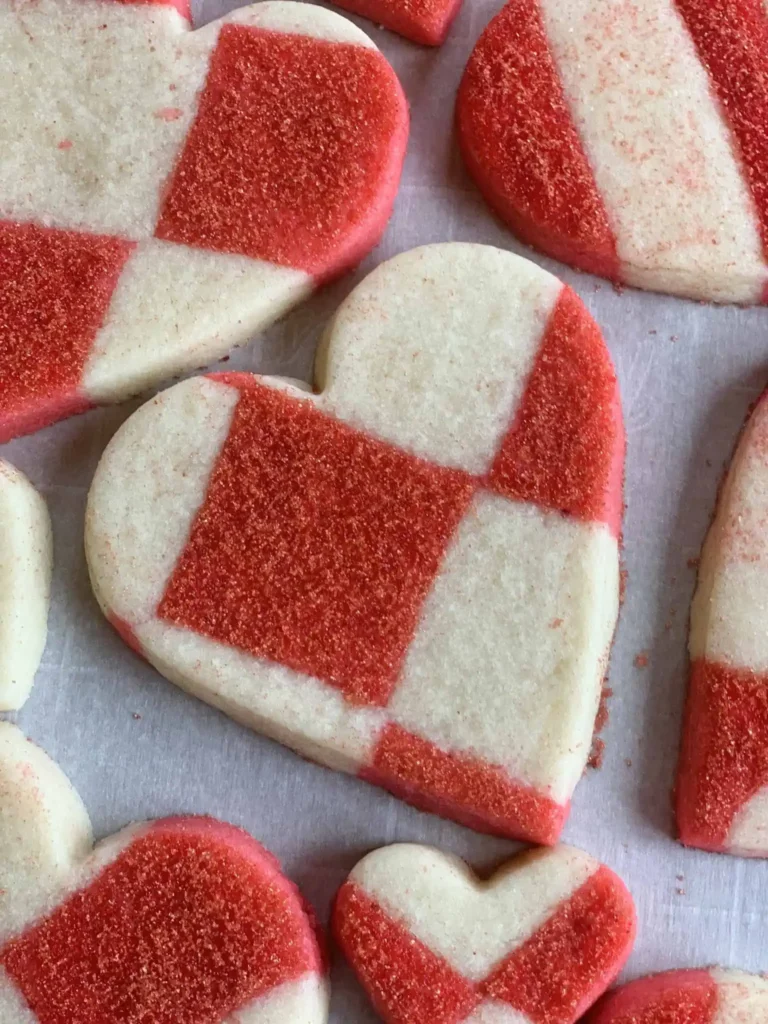
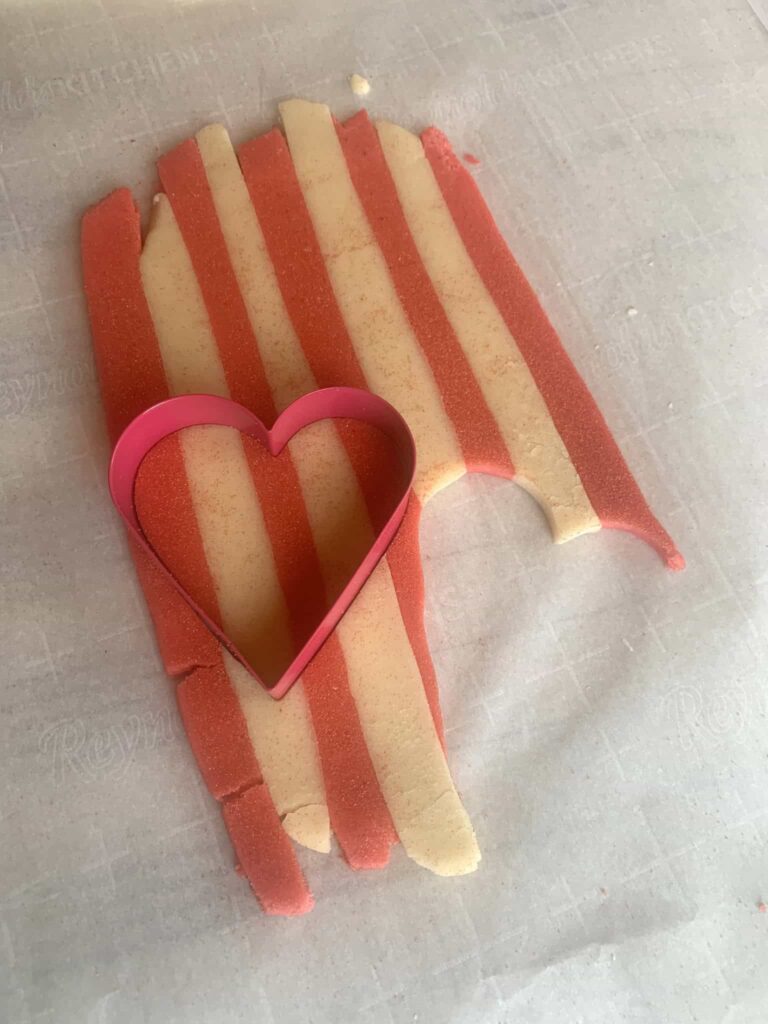
Once patterns are assembled, layer rolled dough sheets between parchment and refrigerate. When you’re ready, simply cut out heart shapes. This method keeps the dough workable and reduces fatigue.
A Simple Royal Icing Accent
While most of these cookies are finished without traditional decorating, a small amount of royal icing can elevate the design when used intentionally.

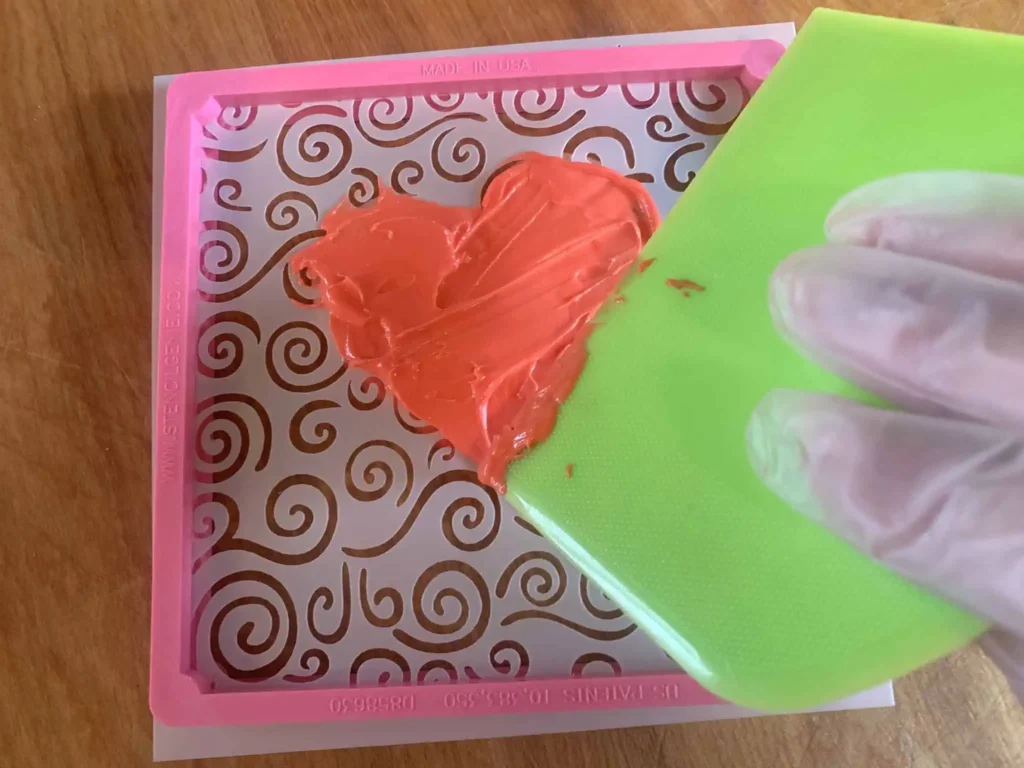
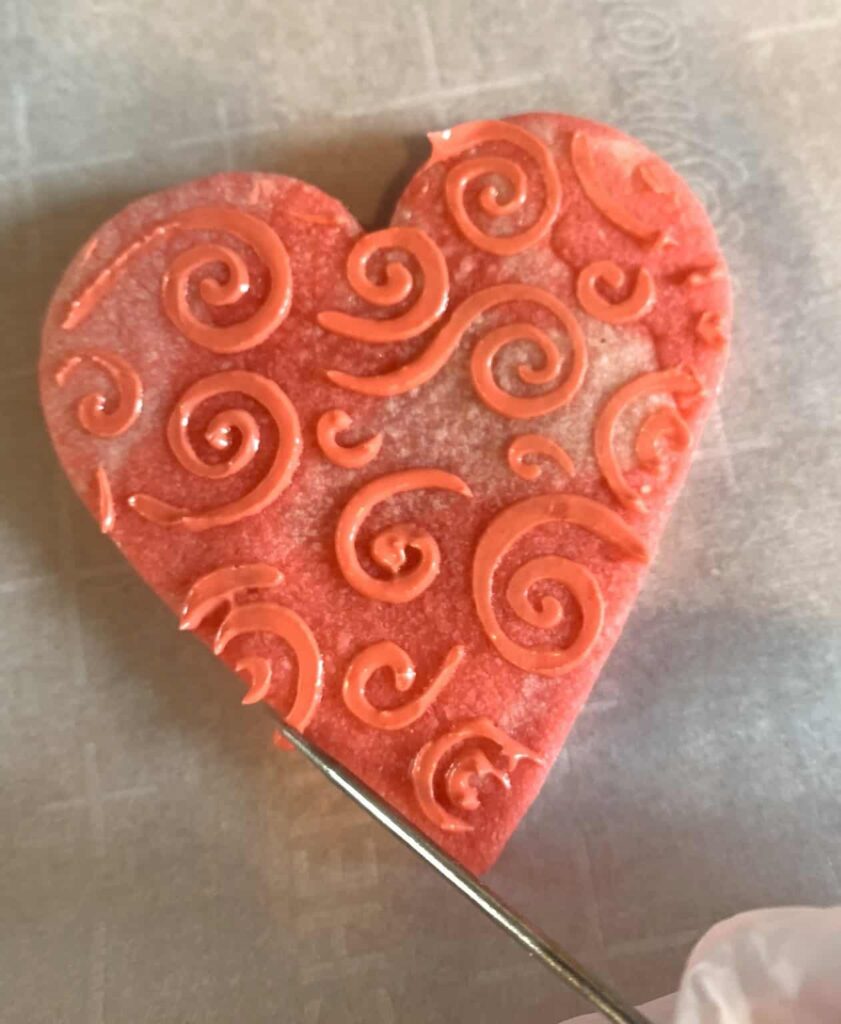
For stenciled accents, a stencil holder such as a Stencil Genie (or similar tool) helps keep the stencil steady and lifted to the height of the cookie. Placing a paper towel beneath the cookie and stencil base prevents slipping and keeps icing neat.
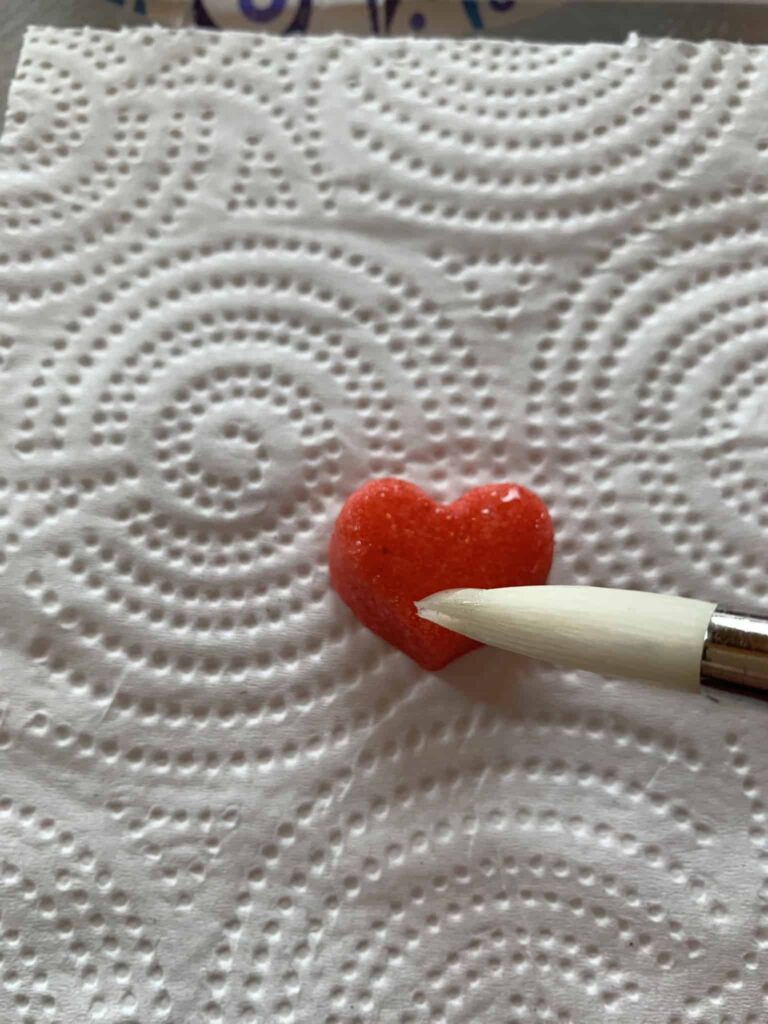
After the icing sets, gently brush away excess sanding sugar with a soft brush for a clean finish.
Tips for a More Enjoyable Cookie Day
A few things we learned along the way that may help you enjoy the process more:
Cookie dough responds best when it’s slightly warmer than usual. If it’s too cold, it can crack or resist rolling.
After assembling patterns, roll lightly—just enough to join the dough without flattening the design.
If sanding sugar drifts or sparkles unevenly, let it. Those little imperfections add charm.
If after baking there isn’t enough sparkle, mix together light karo syrup and dilute with a few drops of water. Then brush onto baked cookies, sprinkle with sanding sugar, allow to dry and brush off excess sugar.
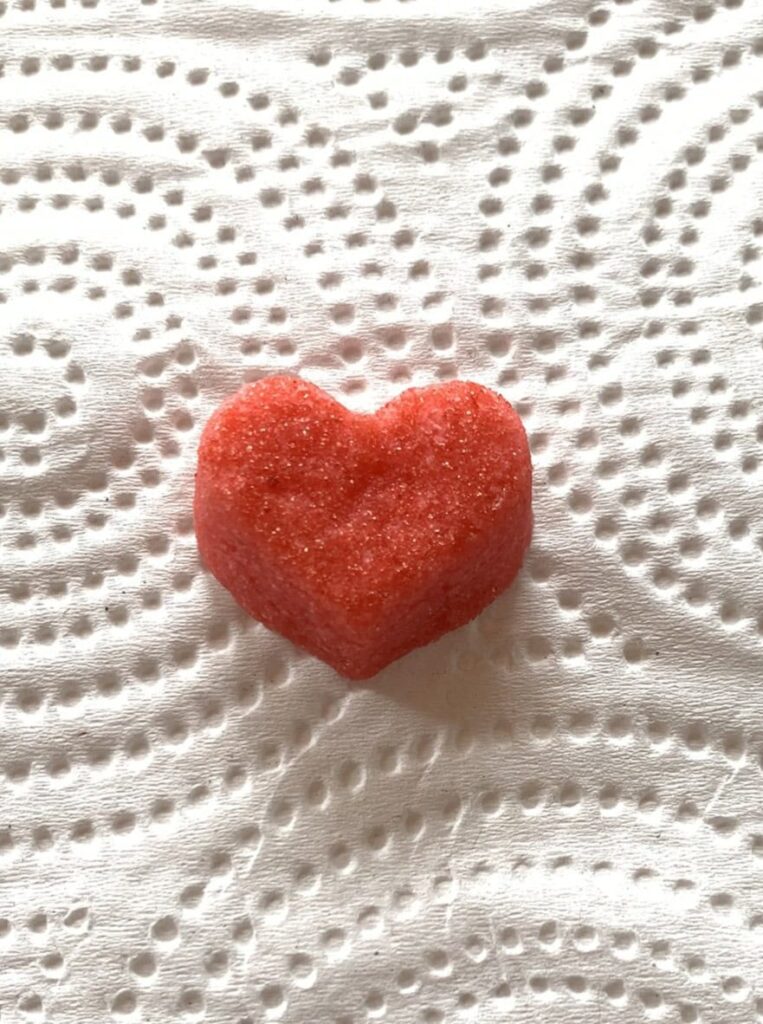
Most importantly, remember that this is meant to be fun. These cookies are forgiving, flexible, and full of personality.
Play, Experiment, and Make Them Your Own
These Playful Valentine Sugar Cookies are just a starting point. Try different colors, larger or smaller hearts, or entirely new patterns. Make bite-sized hearts or oversized statement cookies. Mix scraps and see what happens.
If you give this a try, we’d love to see what you create. You’re welcome to share photos by emailing sparkle@sparkledazzleshine.com or tagging us on Facebook @TheSparkleDazzleShine. Creativity is always better when it’s shared.
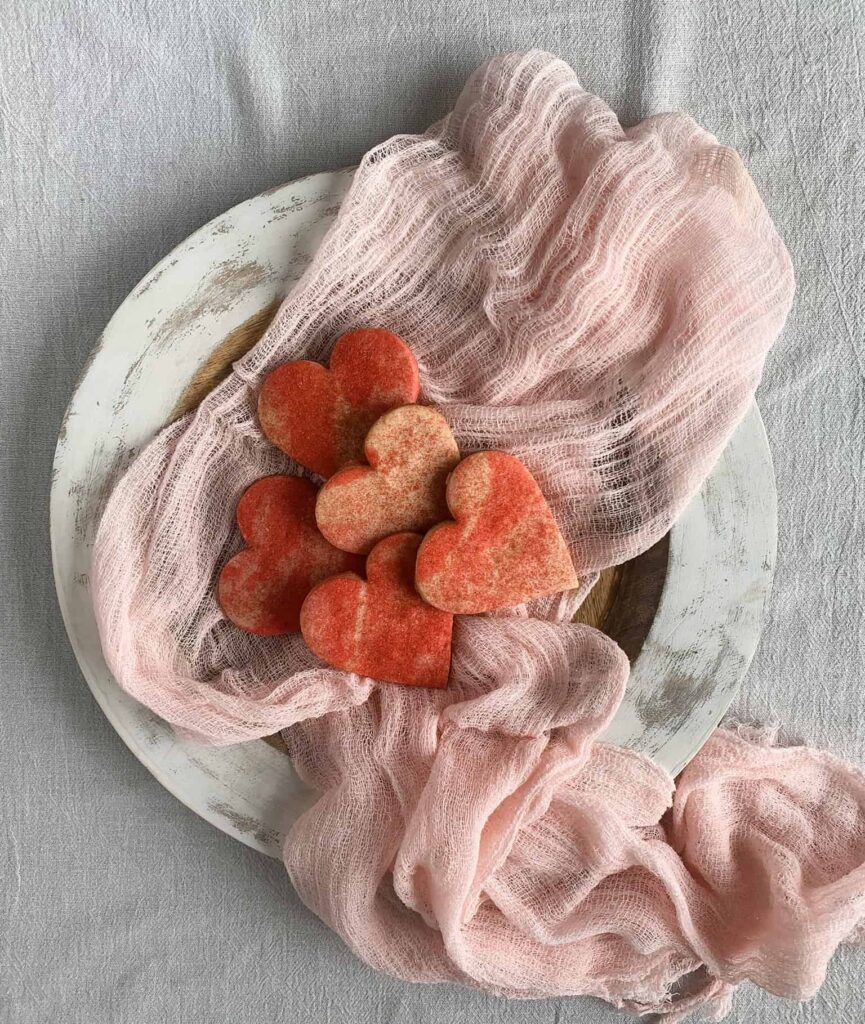
However you choose to play with these Valentine sugar cookies, I hope they bring a little joy, a little sparkle, and a lot of fun into your kitchen.
Free Valentine Gift Tags —
Made to Share the Love
These printable Valentine gift tags are the perfect finishing touch for homemade treats. Simple, sweet, and designed to pair beautifully with your cookies — no extra fuss required.
Print, cut, and tie onto cookie bags, boxes, or plates for an easy way to share something made with love.
Follow us!
Pin & Share!!!