10+ Royal Icing Essentials Every Beginner Should Know

10+ Royal Icing Essentials Every Beginner Should Know along with royal icing tips and tricks changed everything about my cookie decorating journey and transformed me from a frustrated beginner into a confident baker. There’s nothing quite like a perfectly decorated sugar cookie – that shiny, smooth finish, the tiny details, and vibrant colors that make you pause before taking the first bite. Behind every picture-perfect cookie is a story of trial, error, and learning. I know because I’ve been on this sweet journey for over 12 years, and trust me, it didn’t start out flawless.
Just like many home bakers, I started with family recipes passed down through generations. Those first cookies were classic drop cookies—delicious, yes, but they spread too much in the oven to hold shapes for intricate cutout cookies with decorating plans in mind. After countless experiments (and more than a few fails), I found my secret weapon: flash freezing. This simple step keeps my cookie dough firm and helps maintain clean shapes for decorating. It completely changed my results and became the cornerstone of my cookie recipe.

The Magic Behind Royal Icing
Let me tell you about one of the biggest game-changers in my cookie decorating journey – switching to meringue powder. I used to rely on regular egg whites for my royal icing, but talk about unpredictable! One batch would turn out perfect, and the next would be a complete flop. Then I discovered Wilton’s meringue powder (We are not affiliates, just love the product), and everything clicked. Unlike fresh egg whites that can vary in size and freshness, meringue powder gives me consistent results every single time. When mixed with powdered sugar and water, it creates this amazing reaction that turns into the smooth, creamy texture we’re all trying to achieve.

Here’s something I’ve learned after countless batches – making perfect royal icing isn’t just about throwing ingredients together. It’s about patience and precision. While you can definitely use a hand mixer, my stand mixer has become my best friend in the kitchen. It’s not just about convenience (though having both hands free is amazing!) – it’s about getting that perfectly consistent mix every single time.
The Perfect Mix Every Time I always start with what I call my ‘master batch‘ – that’s royal icing at stiff peaks consistency. Think bright white, glossy, and able to hold its shape when piped. Trust me on this one – it’s much easier to thin your icing down than to try to thicken it back up. I treat this base mix like my blank canvas – from here, I can create any consistency I need for different decorating techniques.

What you Should Know about Working With Weather
Let me share something I wish I’d known years ago – your environment plays a huge role in how your royal icing behaves. I learned this lesson the hard way during my first summer of serious cookie decorating. The humidity had my icing acting completely different than usual, and I couldn’t figure out why!
Working in Different Climates
High humidity can really throw a wrench in your cookie decorating plans. Your cookies might become softer, your icing takes forever to dry, and sometimes colors start bleeding into each other – definitely not the look we’re going for! But don’t worry, I’ve got some tricks that have saved countless cookie projects in sticky situations.
When it’s humid, I start with less liquid in my icing mix. It’s also super helpful to keep extra powdered sugar nearby for quick adjustments. One humidity hacks is using a dehydrator on its lowest setting, or even a regular fan for gentle air circulation. If you don’t have a dehydrator, try placing your cookies in the oven at its lowest temperature (usually around 170°F) with the door slightly cracked open (watch them closely, you don’t want crunchy icing).
Unlock Your 51 Page “Free” Sugar Cookie & Royal Icing Toolkit Today!

The Beautiful, printable Sugar Cookie & Royal Icing recipe cards are included inside your FREE Toolkit — Grab it for the prettiest version to save, print, or add to you binder 🍬✨
Say Goodbye to baking stress and Hello to Cookie Perfection. You’ll receive your comprehensive toolkit filled with recipes and guides to transform your Cooking-Making Experience
Your Toolkit is just a click away!
On the flip side, dry conditions can actually be your best friend in cookie decorating. Your icing will set faster, making it perfect for intricate details and layered designs. Just keep in mind you might need slightly more liquid than usual for flooding consistency.
Testing Your Royal Icing Consistency Easy & Essential
Here’s my foolproof method for getting the perfect consistency every time – I call it the ‘count test.’ Draw a knife through your icing and count how long it takes for the line to disappear. For outlining, you want about 15-20 seconds. Flooding consistency? Aim for 8-10 seconds. And for those tiny details? 20+ seconds or more. A phone stopwatch is a handy tool for the count testing.

Here’s my top tip: Always start thicker than you think you need. I keep a spray bottle of water nearby for making tiny adjustments. Remember, you can always thin your icing, but thickening it back up is much trickier!
My Essential Two-Day Cookie Success System
After years of trial and error, I’ve discovered that spreading out the cookie decorating process over two days leads to much better results. Let me walk you through my proven system that takes away the stress and leads to beautiful cookies every time.
Day One the Perfect Cookie Base
The magic starts with proper preparation. I always get my heavy rolling pin ready (I love my marble one, but any sturdy rolling pin works great), silicone spacers for even thickness, and multiple cookie sheets that fit in my freezer. Here’s my can’t-skip tip: flash freezing your cut out cookies for 7-10 minutes before baking. This step completely changed my cookie game – no more spreading or losing those crisp edges during baking.


Day Two Decorating Magic
Here’s something that took me way too long to learn – always color your icing before adjusting the consistency. Trust me, adding food coloring later can throw off your perfectly mixed icing! I divide my colored icing into different portions based on what I need – some for outlining, some for flooding, and some for those tiny details that make cookies extra special.
Essential Tools for Success
Let’s talk about the tools that really make a difference in cookie decorating. After 12 years of decorating, here are the items I wouldn’t want to work without:

Must-Have Tools For Every Beginner
- – A stand mixer (though a hand mixer can work when you’re starting out)
- – Heavy rolling pin with spacers
- – Parchment paper (it’s seriously a game-changer)
- – Quality cookie cutters that keep their shape
- – Tipless piping bags for detail work
- – Standard piping bags for bigger projects
- – A simple scribe tool (or even a toothpick works!)
Nice-To-Have but Not Essential
- – Cookie turntable for easier decorating
- – Stencils for quick detailed designs
- – Small paint brushes for fine details


Storage and Transportation Tips
Nothing’s worse than spending hours on perfect cookies only to have them damaged in storage or transit. Here’s what I’ve learned about keeping cookies fresh and beautiful:
For Undecorated Cookies
- – They’ll stay fresh in the freezer for up to 3 months
- – Always separate layers with parchment paper
- – Store them in airtight containers
- – Thaw completely before decorating
- – For Decorated Cookies
- – Let them dry completely before storing
- – Keep them in airtight containers
- – Store at room temperature for best results
- – For shipping, pack them vertically like books on a shelf

Royal Icing Storage
- – Counter storage works for up to 7 days
- – Refrigerated icing lasts 7-10 days
- – Frozen icing stays good for 1-3 months
- – Always remix thoroughly before using
Troubleshooting Common Royal Icing Problems
Even after years of decorating, I still run into occasional challenges. Here are my tried-and-true solutions for common issues:
Consistency Problems
If your icing’s too thick, add tiny amounts of water (I love using a spray bottle for this). Too thin? Add powdered sugar gradually, mixing well between additions. Remember – patience is key here!
Unlock Your 51 Page “Free” Sugar Cookie & Royal Icing Toolkit Today!
The Beautiful, printable Sugar Cookie & Royal Icing recipe cards are included inside your FREE Toolkit — Grab it for the prettiest version to save, print, or add to you binder 🍬✨
Say Goodbye to baking stress and Hello to Cookie Perfection. You’ll receive your comprehensive toolkit filled with recipes and guides to transform your Cooking-Making Experience
Your Toolkit is just a click away!
Color Issues
Sometimes stored icing separates, but don’t worry! A good remix usually fixes everything. Just remember to test the consistency again after mixing.
Drying Troubles
In humid weather, I use a fan for gentle air circulation some use their oven’s lowest setting with the door cracked. A dehydrator on low works wonders too if you have one. I have also used a hair dry on its lowest volume and heat settings.
Finding Your Supplies
Over the years, I’ve found reliable sources for all my cookie decorating needs. Here are my go-to places:


Everyday Supplies
- – Major craft stores like Michaels and JoAnn’s (don’t forget their coupons!)
- – Local cake decorating shops
- – Amazon
- -Walmart
Specialty Items
- – Wilton’s website for meringue powder and professional tools
- -Walmart carries Wilton’s Meringue Powder and Gel food coloring
- – Etsy for unique cookie cutters
- – Local baking supply stores for fresh ingredients
Enjoy the learning curve
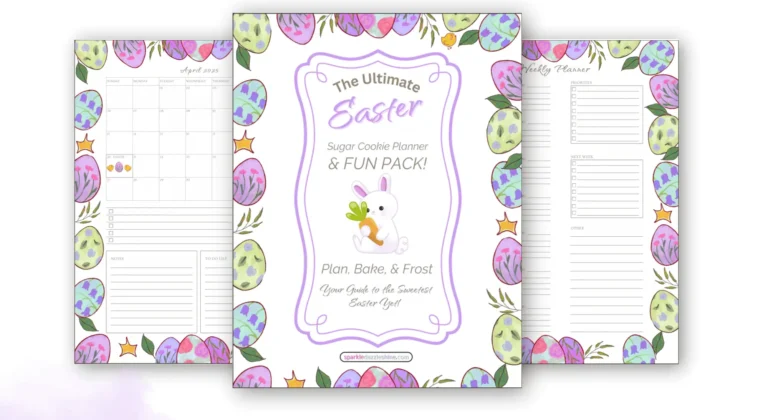
Remember, creating beautiful decorated cookies isn’t about being naturally artistic or knowing secret professional techniques. It’s about having reliable recipes, understanding your ingredients, and most importantly – being patient with yourself as you learn. Every cookie decorator started somewhere, and with these tips and tricks, you’re well on your way to creating cookies that’ll wow your friends and family. We do have a free Sugar Cooking & Royal Icing Toolkit and our free The Ultimate Easter Sugar Cookie Planner that are filled will helpful tips to guide you along the way. Check them out.


Keep practicing, stay organized, and don’t stress about small mistakes – they’re all part of the learning process. I hope these royal icing tips and tricks help you feel confident and ready to tackle your next cookie project. Happy baking!”